Modifying attributes and finishes: Difference between revisions
No edit summary |
No edit summary |
||
| Line 118: | Line 118: | ||
''<big>Modify the finishes of an object</big>''' | '''<big>Modify the finishes of an object</big>''' | ||
So as to give your scene a realistic feel, you can change the colours of the elements. This feature is named '''Finishes''' in InSitu. | So as to give your scene a realistic feel, you can change the colours of the elements. This feature is named '''Finishes''' in InSitu. | ||
Revision as of 15:17, 26 April 2023
|
The features described below are also available with a right click of the mouse button having selected an object.
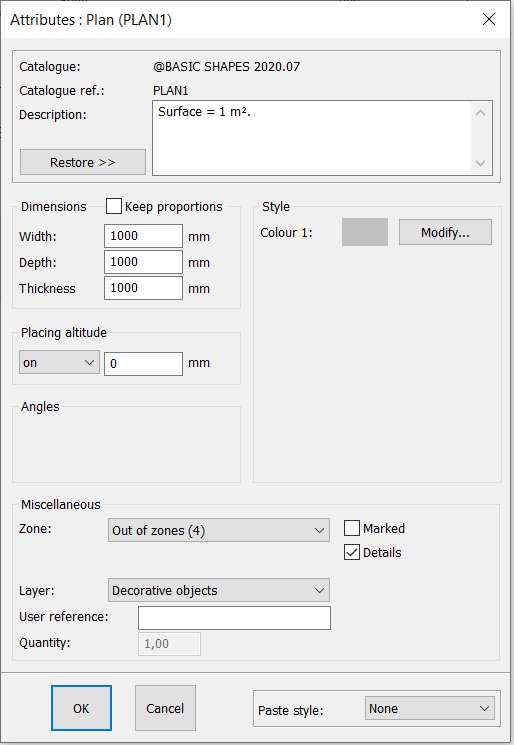
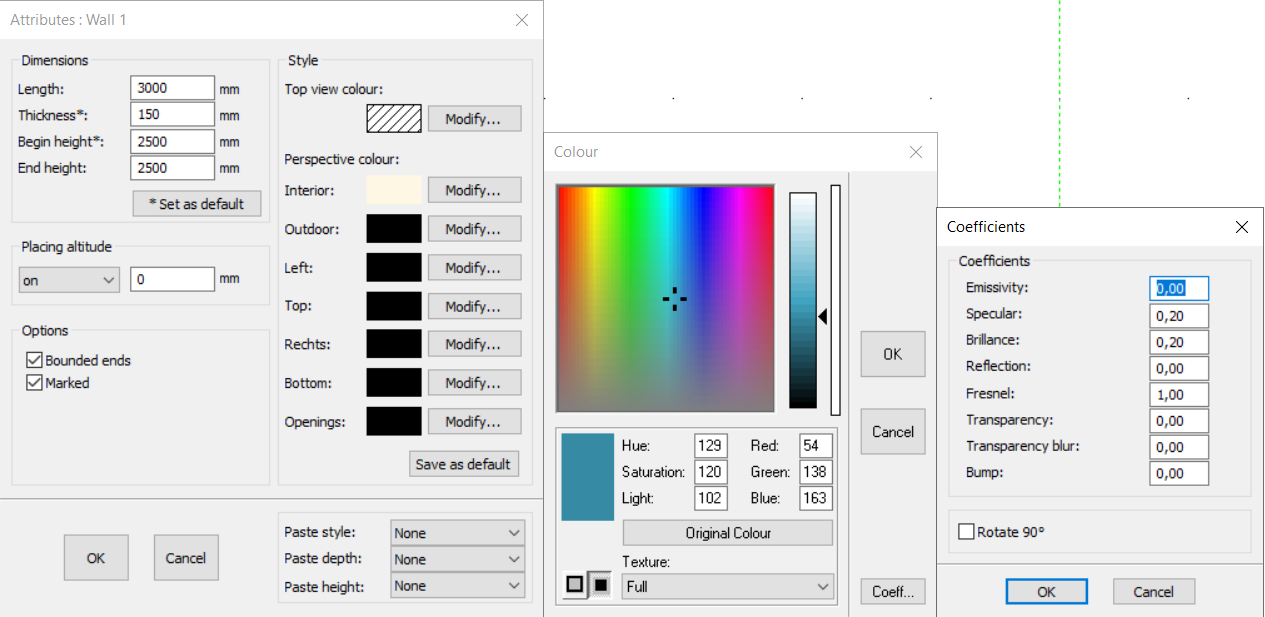
An object's attributes depend on the type of object. Therefore, an Attributes dialog box for a wall will be different from a dialog box for a piece of furniture or a side. Here are the meanings of attributes which require some explanation: 1 - Select an object (inner edge), 2 - Choose "Objects | Attributes", and the "Attributes" window will appear on screen. If several objects have been selected, the window will contain the attributes of the last selected object, which is to say the reference object (the object that's flashing).
o Description : detailed description of the object that can be modified if the authorisation has been given in the Setup | Pricing | Options dialog box. o Section : pricing table to which the object belongs. o Marked : specifies whether the object must have a label with a number or a reference (in top view or in elevation) o Billed : if you untick this box, the object will not be counted in the pricing of the scene even if it has a price. This allows you tu use un object from a catalogue with priced objects simply for decoration. o Details : specifies if the graphic details of the object must be represented in the scene; for example, the feet for furniture. o To order : if you untick this box, the object will be included in the pricing but not in any supplier purchase orders when those are created. This can be useful if you have the object in stock. Thanks to the attributes window, you can modify the width, the depth, the height of an object as well the sill of a Window by changing the value in millimetres in the Placement height, over or under box.
o Start height: height at the original end of a wall. o End height: height at the finishing end of a wall that is different from the previous height if it's a "sloping" wall.
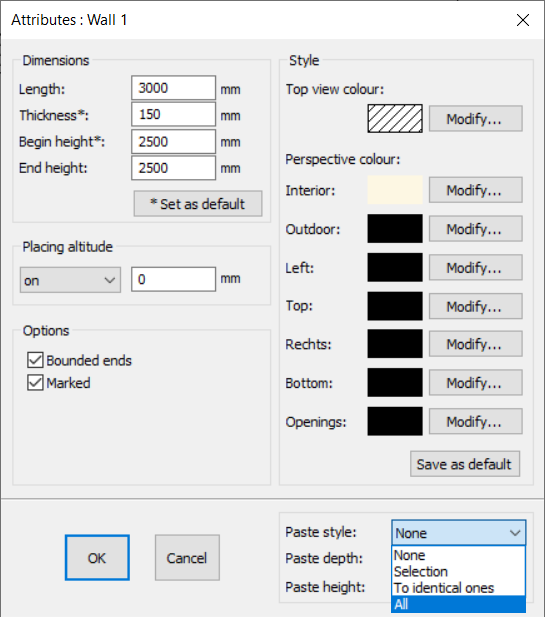
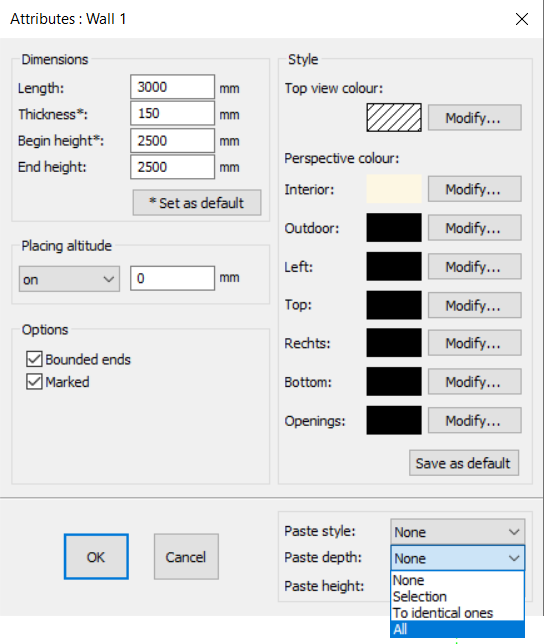
The colour of a wall in persepective is an attribute. Let's see how you can modify the colour of a reference object and apply it to all the other objects.
If you would like the new colour to be the default colour for all the next walls, then click on the By default located in the Style section. Choose All in the Paste style option box to apply the new colour to all the walls in the implantation.
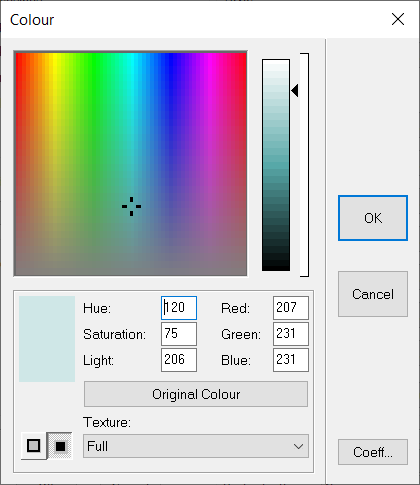
By going through the attributes of an object, you can also modify the colour of an object. Click on modify to open the colour tool box. You can also apply one of the many, many textures offered in the drop down list. The textures with a * can be coloured. The Coeff box allows you to access the coefficients of the texture: Emission: makes it possible for the object to emit a light source Specular : allows you to manage how the light is reflected by the object Brightness: allows you to manage the object's brightness level (the coefficient will be higher for lacquered elements for example) Reflection: allows you to manage the object's level of reflection (the coefficient will be high for a mirror for example) Fresnel: allows you to manage how an object reflects on its environment Transparency: allows you to manage the obejct's level of transparency (the coefficient will be high for glass for example) Transparency blur: allows you to manage the object's level of transparency blur (curtains, glass, ... will have a transparency blur coefficient Bump: allows you to manage the object's level of bump, which is to say the relief of the object Please note: The Rotate by 90° box allows you to rotate a texture 90°
So as to give your scene a realistic feel, you can change the colours of the elements. This feature is named Finishes in InSitu. Select the element (for example a window, a chair...) and the in the Objects menu, choose the Components feature and click on Finishes. Finishes are equally accessible via Components | Finishes by right clicking with the mouse. The following window will pop up, giving you access to the finishes and the colour of the finishes.
|
|

