Modifying the floor's texture: Difference between revisions
Jump to navigation
Jump to search
No edit summary |
No edit summary |
||
| Line 10: | Line 10: | ||
<div align="center"> | <div align="center"> | ||
<p class="cadreimg"> | <p class="cadreimg"> | ||
[[Image: | [[Image:Texturesol_ENG.png|link=]] | ||
</p></div> | </p></div> | ||
| Line 18: | Line 18: | ||
<div align="center"> | <div align="center"> | ||
<p class="cadreimg"> | <p class="cadreimg"> | ||
[[Image: | [[Image:Texturesol2_ENG.png|link=]] | ||
</p></div> | </p></div> | ||
| Line 25: | Line 25: | ||
<div align="center"> | <div align="center"> | ||
<p class="cadreimg"> | <p class="cadreimg"> | ||
[[Image: | [[Image:Texturesol3_ENG.png|link=]] | ||
</p></div> | </p></div> | ||
Revision as of 16:26, 26 April 2023
|
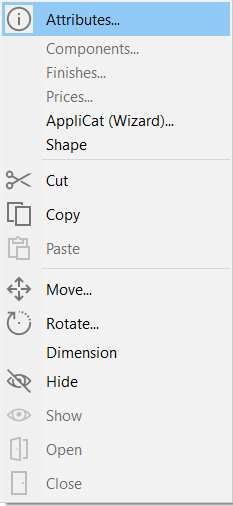
You have placed your floor but you want to modify it so that you can add a parquet floor texture for example.
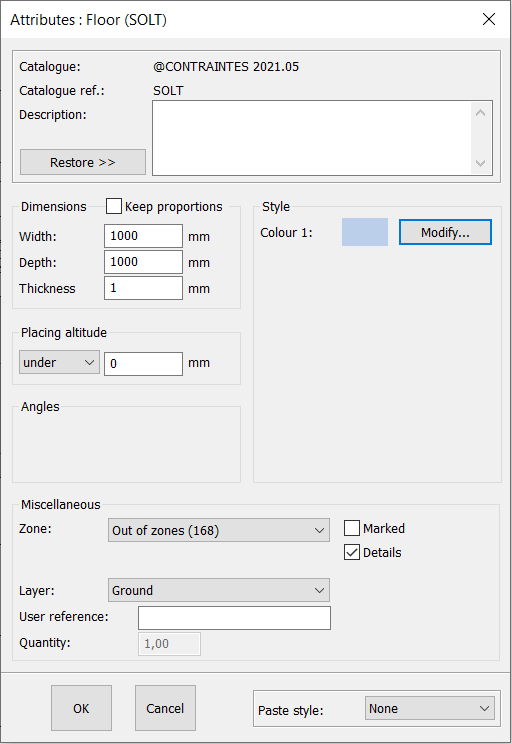
The following window will appear:
Use the drop down menu below Textures to select the texture you wish to give the floor. You have the choice of parquets, carpets, tiling...
|
|


