Importing 3D Warehouse objects: Difference between revisions
No edit summary |
No edit summary |
||
| (One intermediate revision by the same user not shown) | |||
| Line 1: | Line 1: | ||
<div id="top"></div> | |||
<table width="100%"> | <table width="100%"> | ||
<tr> | <tr> | ||
<td width=" | <td width="80%"> | ||
<!-- contenu --> | <!-- contenu --> | ||
<h1 class="title_page">Importing 3D Warehouse objects</h1> | |||
<div align="center"> | <div align="center"> | ||
<p class="cadrevideo"> | <p class="cadrevideo"> | ||
| Line 23: | Line 26: | ||
<div align="center"> | <div align="center"> | ||
<p class="cadreimg"> | <p class="cadreimg img-full"> | ||
[[Image:3Dwarehouse_ENG.png|link=]] | [[Image:3Dwarehouse_ENG.png|link=]] | ||
</p></div> | </p></div> | ||
| Line 47: | Line 50: | ||
<div align="center"> | <div align="center"> | ||
<p class="cadreimg"> | <p class="cadreimg img-full"> | ||
[[Image:3Dwarehouse3_ENG.png|link=]] | [[Image:3Dwarehouse3_ENG.png|link=]] | ||
</p></div> | </p></div> | ||
| Line 69: | Line 72: | ||
<div align="center"> | <div align="center"> | ||
<p class="cadreimg"> | <p class="cadreimg img-full"> | ||
[[Image:3Dwarehouse4_FR.png|link=]] | [[Image:3Dwarehouse4_FR.png|link=]] | ||
</p></div> | </p></div> | ||
| Line 89: | Line 92: | ||
</td> | </td> | ||
<td valign="top" width=" | <td valign="top" width="20%"> | ||
{{:En_Décorer}} | {{:En_Décorer}} | ||
| Line 97: | Line 100: | ||
</table> | </table> | ||
<span class="btnretour">[[#top| | <span class="btnretour">[[#top|Back top of page]]</span> <span class="btnhome">[[Modifying attributes and finishes|Next step]]</span> | ||
Latest revision as of 13:04, 6 August 2024
Importing 3D Warehouse objects
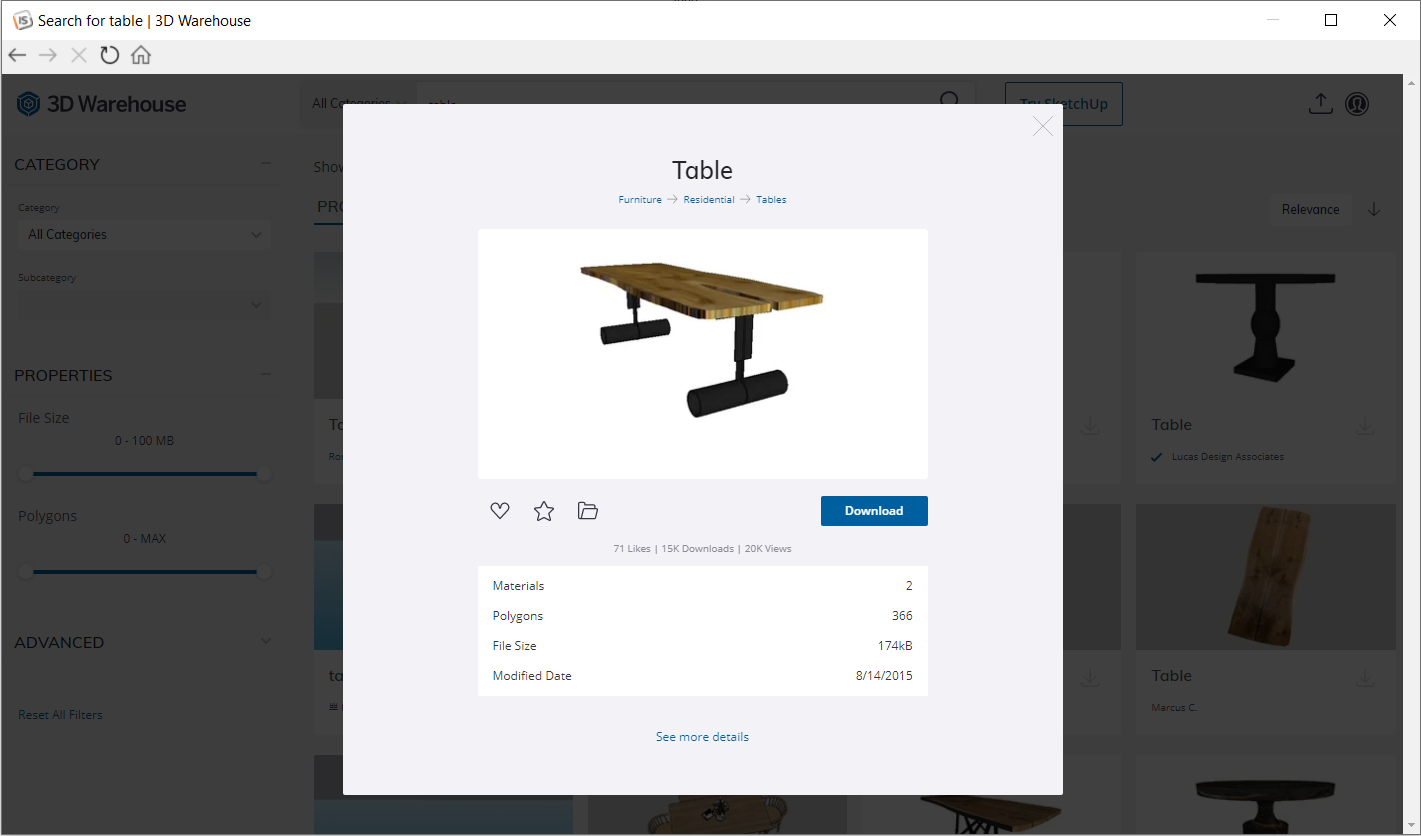
The "3D Warehouse" is a library of 3D objects that are freely accessible through the Internet. A search engine allows you to find the desired object amongs the thousands of objects the library contains. The "3D Warehouse" contains both everyday items and architecture elements. All you need to do is search for the desired object and click on the download button for it to automatically appear in the current scene. Before appearing, a dialog box will allow you to input the measurements of the object, to give it various attributes (reference, description, price, etc.) and to change its colours by default.
- either by directly performing a drag and drop of the object from the 3D Warehouse window towards InSitu in your project. - or by clicking on the image to open it, seeing the information about the object, and then clicking the "Download" button
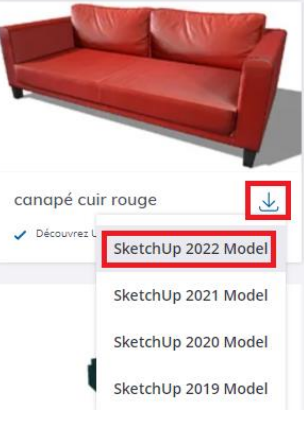
STEP 1 - DOWNLOADING THE OBJECT 1 - Launch your web browser: Chrome, Edge or Firefox (the 3D Warehouse website no longer works with Internet Explorer). 2 - Enter this url https://3dwarehouse.sketchup.com/ in your browser. 3 - Search for the object in the database as you usually would. 4 - Click on the blue Download arrow and choose the 2022 format. Careful, the 3D warehouse website now requires you to be signed up. Create an account if you haven't already.
STEP 2 - IMPORTING TO INSITU 1 - In your InSitu project, click on File | Import | 3D file and search for the object in the folder that you saved it in. 2 - Select the object and click on Open. 3 - The object will be downloaded and appear in the scene.
|
|


