Placing wall tiling: Difference between revisions
No edit summary |
No edit summary Tag: Manual revert |
||
| (9 intermediate revisions by 2 users not shown) | |||
| Line 1: | Line 1: | ||
<div id="top"></div> | |||
<table width="100%"> | <table width="100%"> | ||
<tr> | <tr> | ||
<td width=" | <td width="80%" align="left"> | ||
<!-- contenu --> | <!-- contenu --> | ||
<h1 class="title_page">Placing wall tiling</h1> | |||
Tiling can be placed in two different ways: either with the help of shapes or automatically (in credenza) | Tiling can be placed in two different ways: either with the help of shapes or automatically (in credenza) | ||
You have the choice between a priced and non-priced version of the "@TILING" catalogue. | You have the choice between a priced and non-priced version of the "@TILING" catalogue. | ||
''<big>Placing tiling with shapes (shape feature)</big>''' | '''<big>Placing tiling with shapes (shape feature)</big>''' | ||
You need to trace the edges of the entirely of the tiles, wall by wall or to the floor. | You need to trace the edges of the entirely of the tiles, wall by wall or to the floor. | ||
| Line 25: | Line 28: | ||
''<big>Placing tiling in credenza (Scene drop down menu feature | Automatic tiling)</big>''' | '''<big>Placing tiling in credenza (Scene drop down menu feature | Automatic tiling)</big>''' | ||
<div align="center"> | <div align="center"> | ||
<p class="cadrevideo"> | <p class="cadrevideo"> | ||
<youtube width="500" height="300"> | <youtube width="500" height="300"> | ||
https://www.youtube.com/watch?v= | https://www.youtube.com/watch?v=nitymzlAqec&list=PL7MrU2icgiqFNRac8DBS4xYfBdCpr-tN9&index=7 | ||
</youtube> | </youtube> | ||
<br>Voir le tutoriel vidéo | <br>Voir le tutoriel vidéo | ||
| Line 68: | Line 71: | ||
<div align="center"> | <div align="center"> | ||
<p class="cadreimg"> | <p class="cadreimg img-full"> | ||
[[Image: | [[Image:Posecarrelage6_ENG.png|link=]] | ||
</p></div> | </p></div> | ||
| Line 91: | Line 94: | ||
<div align="center"> | <div align="center"> | ||
<p class="cadreimg img-full"> | <p class="cadreimg img-full"> | ||
[[Image: | [[Image:Posecarrelage8_ENG.png|link=]] | ||
</p></div> | </p> | ||
<br/> | |||
</div> | |||
<!-- fin contenu --> | <!-- fin contenu --> | ||
| Line 105: | Line 111: | ||
</table> | </table> | ||
<span class="btnretour">[[#top| | <span class="btnretour">[[#top|Back top of page]]</span> <span class="btnhome">[[Importing 3D Warehouse objects|Next step]]</span> | ||
Latest revision as of 16:55, 6 August 2024
Placing wall tilingTiling can be placed in two different ways: either with the help of shapes or automatically (in credenza) You have the choice between a priced and non-priced version of the "@TILING" catalogue. Placing tiling with shapes (shape feature) You need to trace the edges of the entirely of the tiles, wall by wall or to the floor.
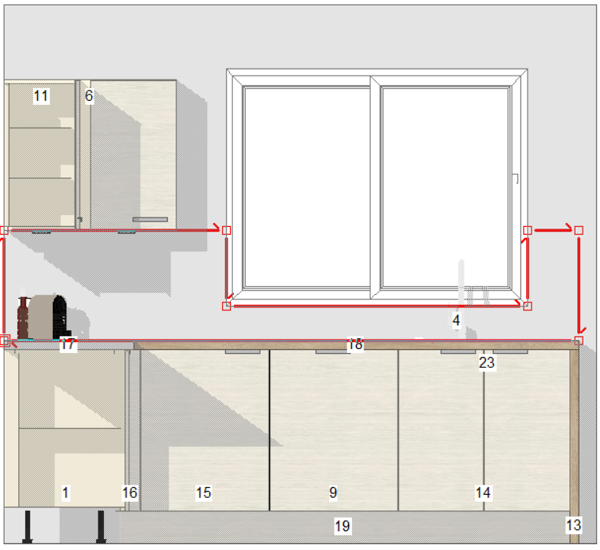
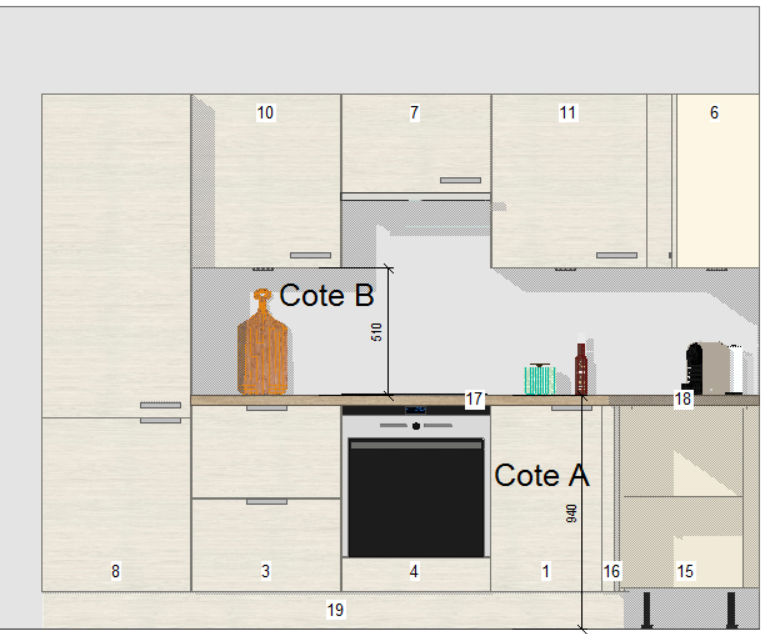
Having created your scene on InSitu, you will need to take a reading of the following sides. a) Side A, above the work plan b) Side B, the top of the work plan beneath the high furniture (credenzas)
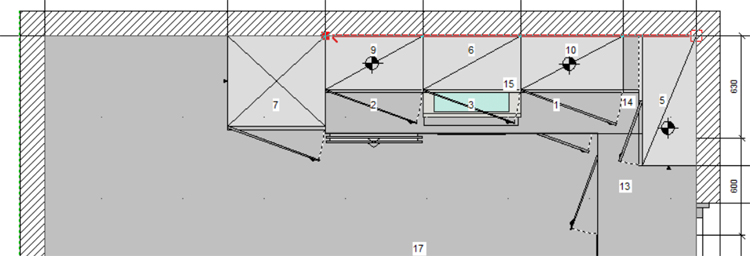
Then, you need to determine between which two points of the shape you wish to place your tiles. c) Place the shape in top view, in a clockwork manner (you can go in front of a window or a door).
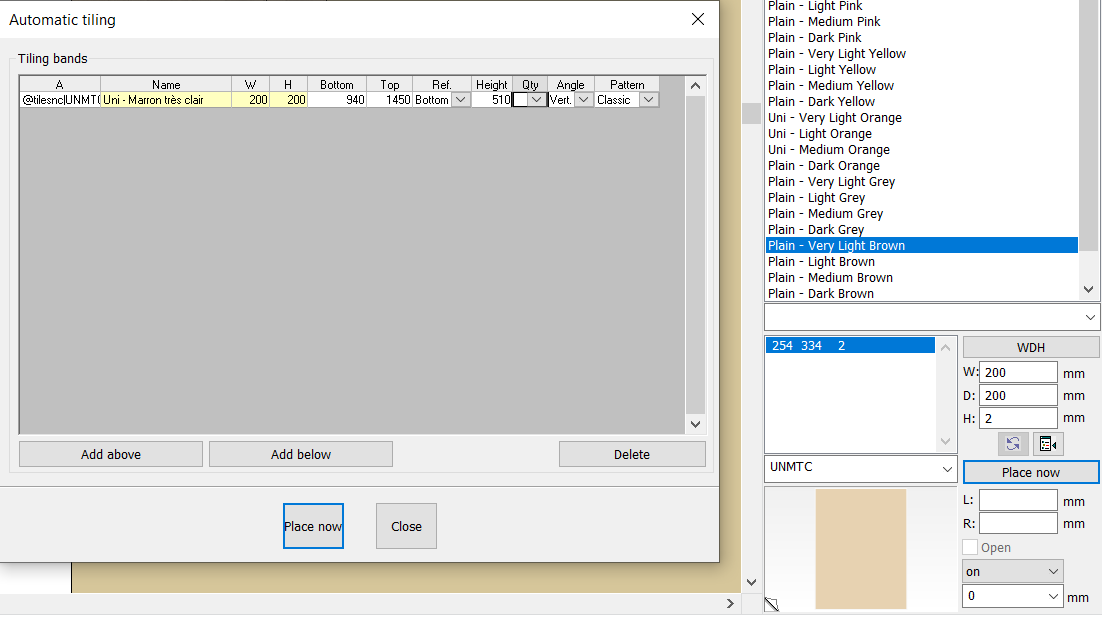
Next, make the dialog box appear by clicking on Scene | Automatic tiling a) Click on "Add above" then select a tiling (Earthenware) in the @TILING catalogue b) Drag and drop the tiles (you can change their dimensions) from the place window to the yellow box (like for a piece of furniture) c) Fill in the "Low" box, which corresponds to the height of the floor above the work surface (here: 940). d) Fill in the "Height" box which corresponds to the height of the credenza (here 510). e) Finish by clicking on "Place".
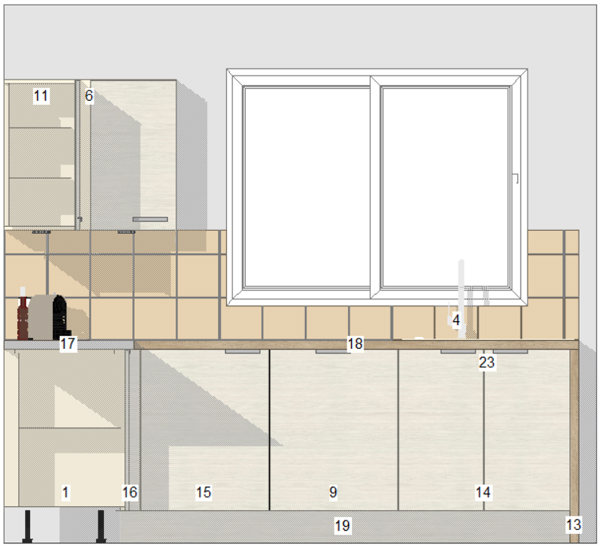
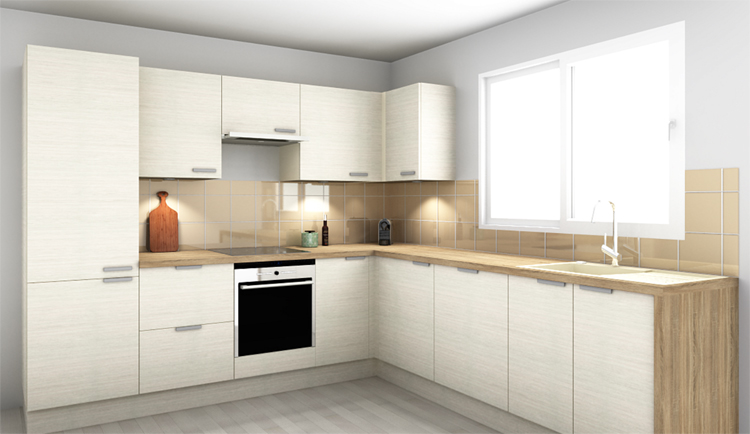
Here is the final result in the 3D photorealistic perspective :
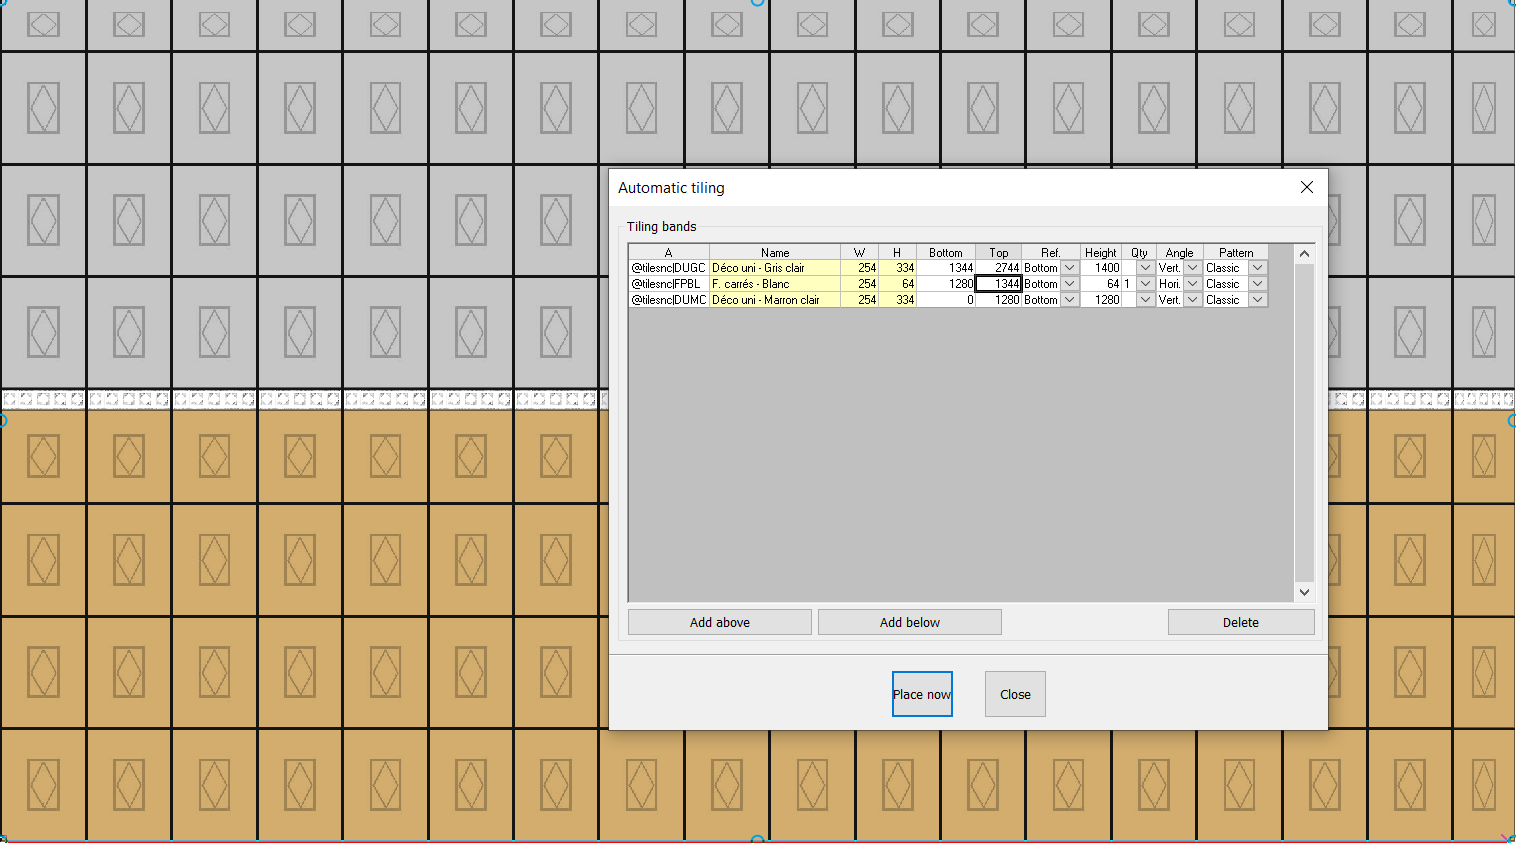
Here are some points to remember: a) You can place different levels of tiles b) Le gabarit doit être retiré après la pose du carrelage The shape must be withdrawn after the tiling has been placed c) You can change different tiles: listel, decorative, etc. Here is an example of several levels of tiling with the "automatic tiling" dialog box. Keep in mind that the final height must be entered in the last row of the tiling.
|
|
