Modifying the floor's texture: Difference between revisions
Jump to navigation
Jump to search
No edit summary |
No edit summary |
||
| Line 4: | Line 4: | ||
<td width="79%"> | <td width="79%"> | ||
<!-- contenu --> | <!-- contenu --> | ||
<h1 class="title_page">Modifying the floor's texture</h1> | |||
You have <b>[[Placing the floor and ceiling|placed your floor]]</b> but you want to modify it so that you can add a parquet floor texture for example. | You have <b>[[Placing the floor and ceiling|placed your floor]]</b> but you want to modify it so that you can add a parquet floor texture for example. | ||
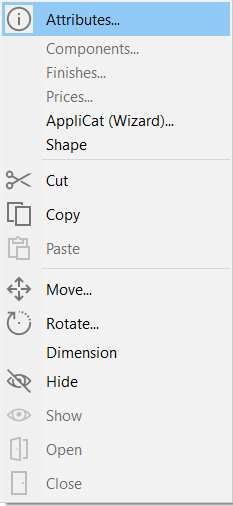
<br/>To do so, select your floor and right click, and then choose Attributes: | <br/>To do so, select your floor and right click, and then choose Attributes: | ||
| Line 48: | Line 50: | ||
</table> | </table> | ||
<span class="btnretour">[[#top| | <span class="btnretour">[[#top|Back top of page]]</span> <span class="btnhome">[[Importing 2D and 3D files|Next step]]</span> | ||
Latest revision as of 14:37, 6 August 2024
Modifying the floor's textureYou have placed your floor but you want to modify it so that you can add a parquet floor texture for example.
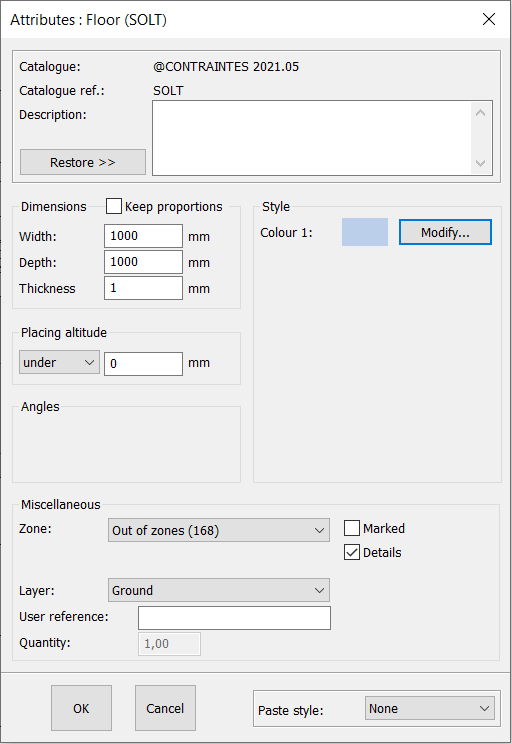
The following window will appear:
Use the drop down menu below Textures to select the texture you wish to give the floor. You have the choice of parquets, carpets, tiling...
|
|