Creating a palette of textures
|
You can create your own texture palette. This table of textures allows you to define all the colours (with or without material effects). You can link coefficients and images to textures so that you can better control characteristics like the level of transparency, of reflection and more when in the "photorealism" mode. To create your own texture palette, go to the Setup drop down menu and click on Graphic | Palette ..., (Fig.38a)
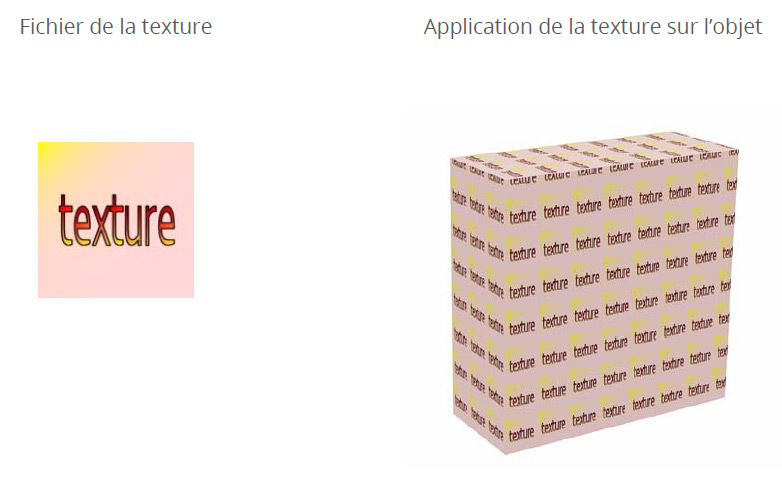
The textures are displayed on a volume per paving, which means that the texture that you create will recreate itself as many times as possible in the available space (width, depth and height) like when tiles are placed.
Code Section Each texture needs a code. This code must be unique and cannot exceed eight characters. In the textures table, the code is not necessarily the same as the colour's commercial code.
This refers to the material's name. For example: Matt white melamine
This is the colour that will appear in all the generic finishes, objects and attributes windows in InSitu. To set the colour, click twice on the cell. A Colour dialog box will appear on screen.
By double clicking this section, you will give access to the material's file. For example: Exoticwood1.Jpg. Important: this jpg or bmp file must imperatively be placed beforehand in the "InSitu\Textures" folder.
They correspond to the height in millimetres that the texture will be displayed in. For example, if your "Exoticwood1.Jpg" file represents a 600 mm wide and 1200 mm high sample of wood, those are the measurements you should enter.
This box allows you to convert the jpg or bmp file into black and white, and you can then tint it to the colour of your choice.
When a .jpg or .bmp file is too light or dark, this can lead to a loss of detail in InSitu. By ticking the "Modulated" box, the engine that creates the computer-generated image will make calculations differently from the file and will find the detail that consists of adding or removing contrast (available for textures that are nearly black and white).
If you tick this box, the jpg or bmp file will be integrated directly to the catalogue or the palette. This will notably allow you to copy the catalogue and/or the palette without also needing to copy the textures that are associated to it (contained in the InSitu texture folder), since they are then already contained in the catalogue and/or palette.
The Emission
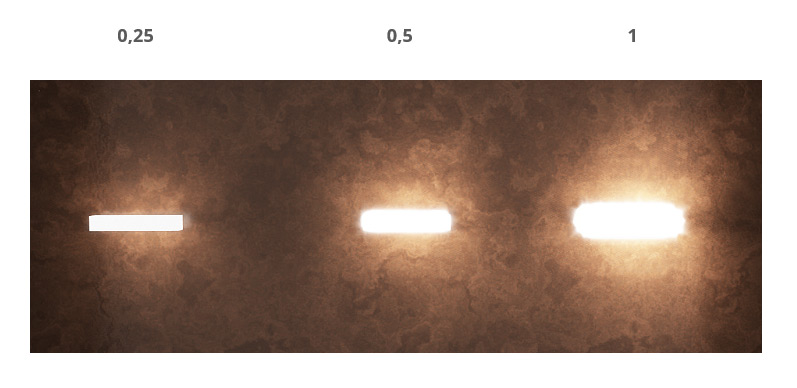
The Emission Section allows you to simulate an illuminating surface. It is only visible as a final computer-generated image. Here is an example of an illumination image in final photorealism perspective with a coefficient of:
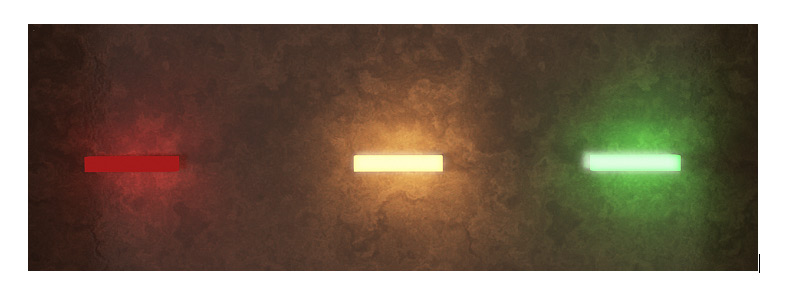
If you add a colour via the Colour section, the emission will be coloured too.
The specular
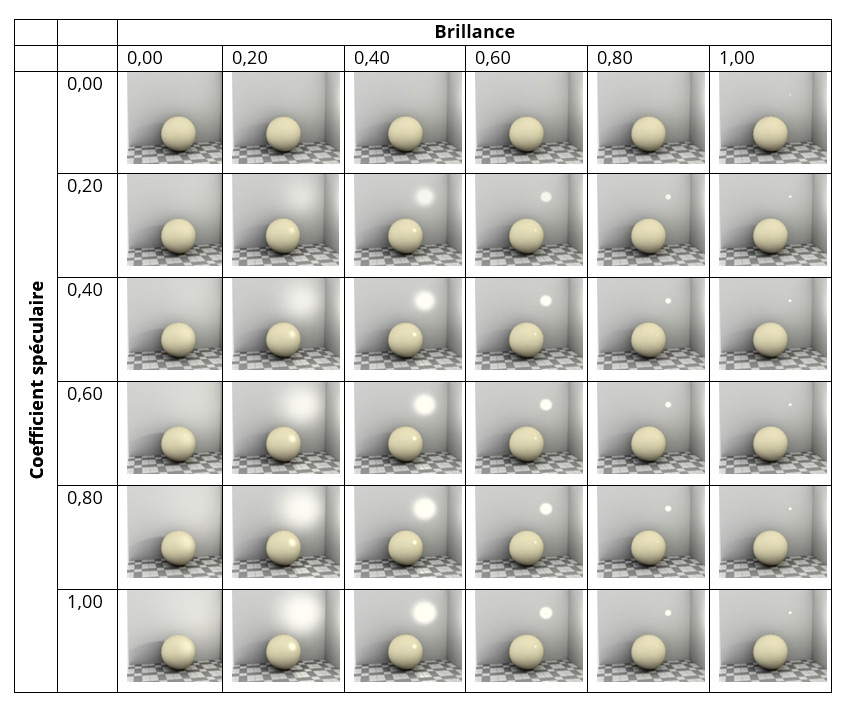
The sections to do with the Specular allow you to vary the impact of light on the created texture when light is being shone on it. Generally, the smoother the surface of an object is, the more you need to increase teh Specular value.
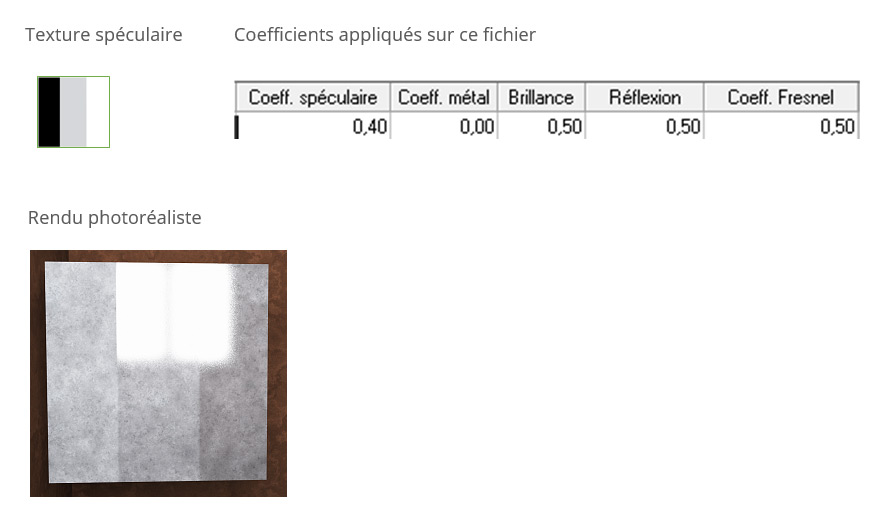
Putting a jpg file in the Specular texture section will allow you to specify to the engine that generates images precise locations so that it can calculate reflection and brightness. This file must be interpreted in black and white. Black will be less bright and/or less reflective. The white would be very reflective and/or very bright. An example of a jpg file to use in the Specular texture section:
Important: This jpg file must imperatively be placed beforehand in the "InSitu\Textures" folder.
This is the measurement of the width in mm of the specular texture that will appear on the object in InSitu.
This is the measurement of the height in mm of the specular texture that will appear on the object in InSitu.
This is a coefficient that goes from 0,00 to 1,00 that allows you to change the impact of light on the material when the material is lit up. For a matt lacquer, the coefficient will be between 0,10 and 0,20. For a satin lacquer, it will be between 0,20 and 0,40. For a glossy lacquer, it will be between 0,40 and 0,80.
The specular needs to be set up with regard to the brightness, reflection, metal coefficient and Fresnel coefficient settings. Brightness and reflection often work in conjunction of one another.
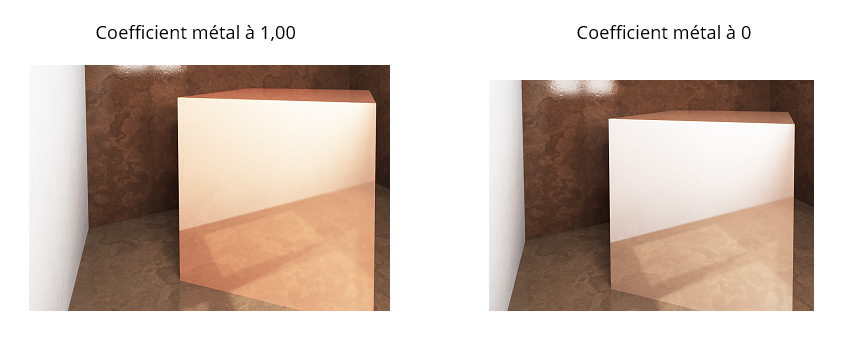
It allows objects reflected in the created texture to inherit some of its colour. The higher the metal coefficient is, the more the reflection will be tinted.
Some materials are more or less reflective, depending on the viewing angle and the angle of the light. For example, the surface of the water with a grazing light will reflect the sky if we look at it from afar. However, the same water will reflect the sky a lot less if we look at it with our feet in the water. With a 1,00 Fresnel coefficient: the object will reflect light in every direction. The coefficient needs to be applied for: Mirror, Chrome.... With a Fresnel coefficient approaching 0: the object will only reflect light under certain conditions such as the viewing angle, the angle of the light impacting the object. For example, water and glass have a coefficient of 0,05. Metals have a coefficient between 0,3 and 0,5.
Transparency
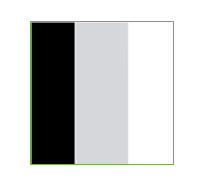
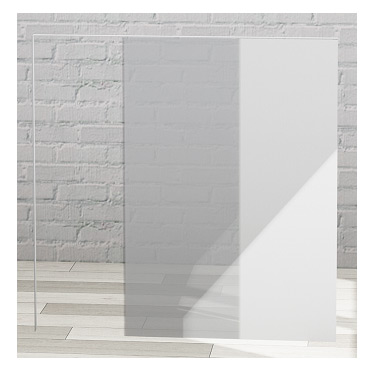
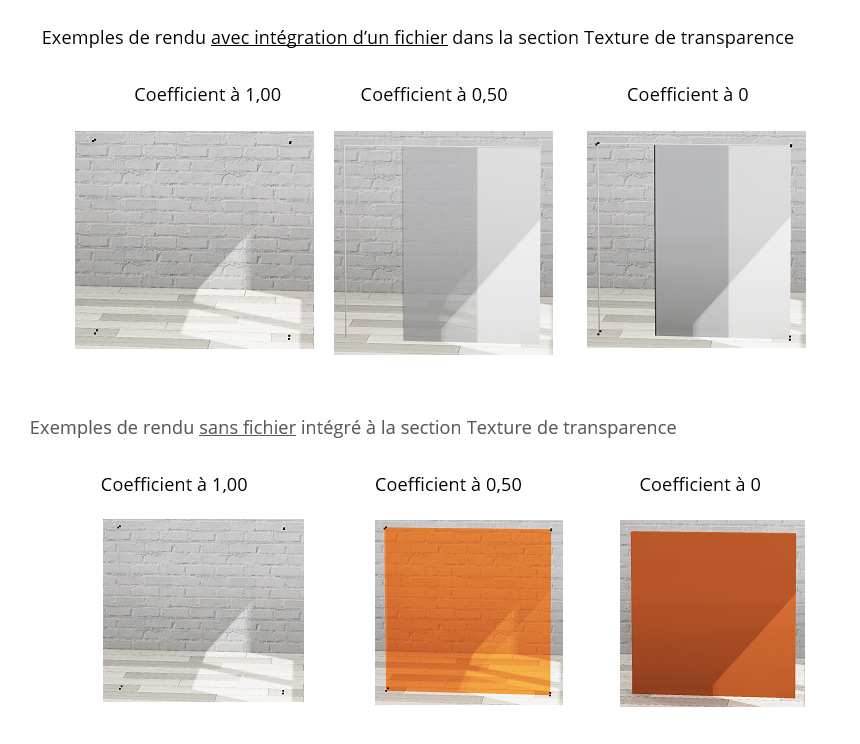
Transparency Texture Section Putting a jpg file in the Transparency Texture section will allow you to vary the opaqueness of the transparency. This file must be a certain level of grey as in this file, black would be transparent, white would be opaque and grey would be more or less semi-opaque (varies if it's light or dark). Example of a jpg file to use in the Transparency Texture section:
Important: this jpg file must imperatively be placed beforehand in the "InSitu\Textures" folder. Example of a final image with this transparency file. As mentioned above, black is transparent, white is opaque and grey is more or less semi-opaque.
This is the measurement of the width in mms in which the transparency texture will be displayed on the object in InSitu.
This is the measurement of the height in mms in which the transparency texture will be displayed on the object in InSitu.
This is a coefficient between 0,00 and 1,00 that alters the transparency. The higher the coefficient is, the more transparenct it will become.
This is a coefficient ranging from 0,00 to 1,00 that alters how clear objects behind a transparent texture appear. In this example, a black cube was placed behind an object with a transparency texture with a transparency coefficient of 0,50.
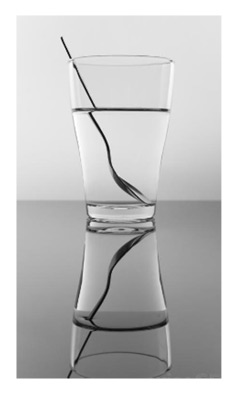
Every transparent material deviated the view of objects, as shown in the photo below. A spoon dipped in a glass will be deviated by the refraction of the water and of the glass.
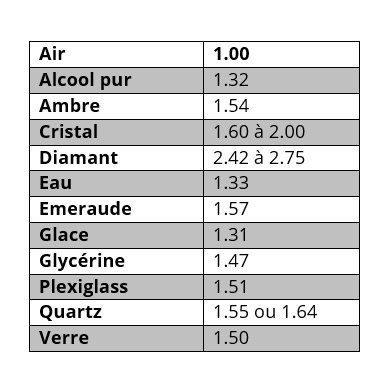
Index set at 1,00 = minimum refraction. Index set at 3,00 = maximum refraction For example, here is a table of the index for a few materials:
Le bump
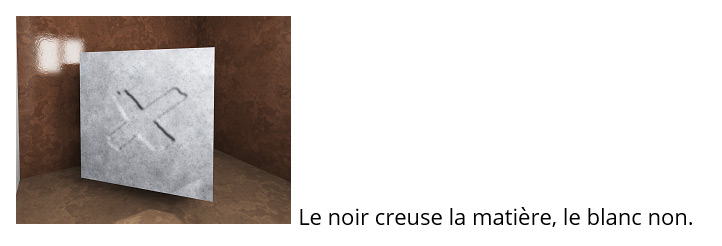
Putting in a jpg file into the Bump Texture section will allow you to alter the relief of the texture. This jpg file must be interpreted in black and white. Example of a file used for the bump:
This is the measurement of the width in mms in which the bump texture will be displayed on the object in InSitu.
This is the measurement of the height in mms in which the bump texture will be displayed on the object in InSitu.
The bump coefficient can range from 0,00 to 1,00. The higher it is, the more pronounced the relief will be. Result with a 1,00 bump coefficient:
Les cases à cocher
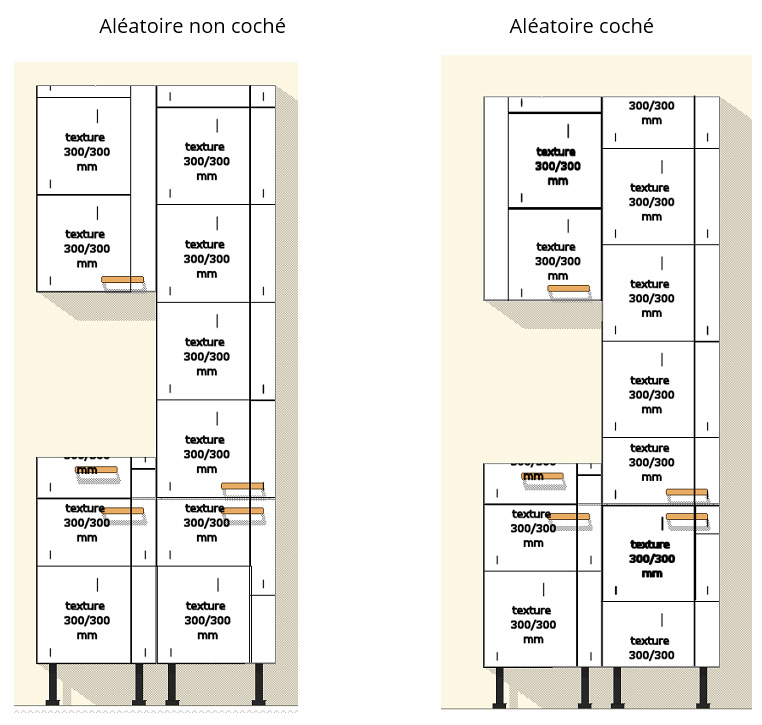
This box allows to offset the paving grid from the texture. This can be useful when a motif always repeats itself in the same place (on the faces of kitchen furniture or on tiles for example).
This box allows you to rotate the jpg or bmp file 90° from the texture integrated in the File section. Therefore, from only one wood type texture file, you can generate a version with a horizontal wire and another with a vertical wire. All you need to do is copy the created texture and tick the Rot90 box for one of the two.
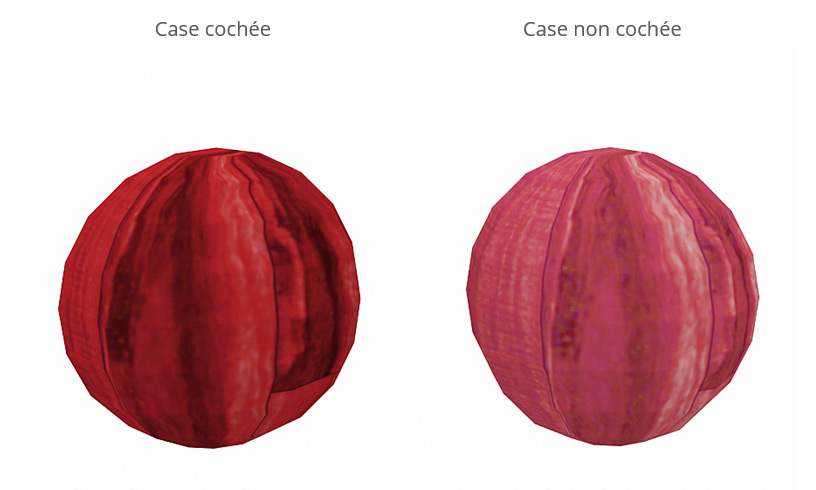
When this box is ticked, it allows the texture to be impacted by the gamma correction of the engine of the computer-generated images of InSitu. The gamma correction allows for more realistic results. It corresponds to the definition of the shadows and lights on the surfaces as well as the brightness and the contrast on 3D volumes.
|
|

