Shortcuts and key buttons in InSitu: Difference between revisions
No edit summary |
No edit summary |
||
| (9 intermediate revisions by one other user not shown) | |||
| Line 4: | Line 4: | ||
<td width="80%" align="left"> | <td width="80%" align="left"> | ||
<!-- contenu --> | <!-- contenu --> | ||
<h1 class="title_page">Shortcuts and key buttons in InSitu</h1> | |||
Like most software, InSitu has many shortcuts and key buttons (hotkeys). | |||
These can help you do lots of things, such as duplicating an element, changing the direction of an element, selecting 2 elements, etc. | |||
We will now list these hotkeys with the help of case studies. | |||
<div align="center"> | <div align="center"> | ||
| Line 16: | Line 16: | ||
<div align="center"> | <div align="center"> | ||
<p class="cadreimg gif"> | <p class="cadreimg gif"> | ||
[[Image: | [[Image:Raccourcictrl_EN.gif|link=]] | ||
</p></div> | </p></div> | ||
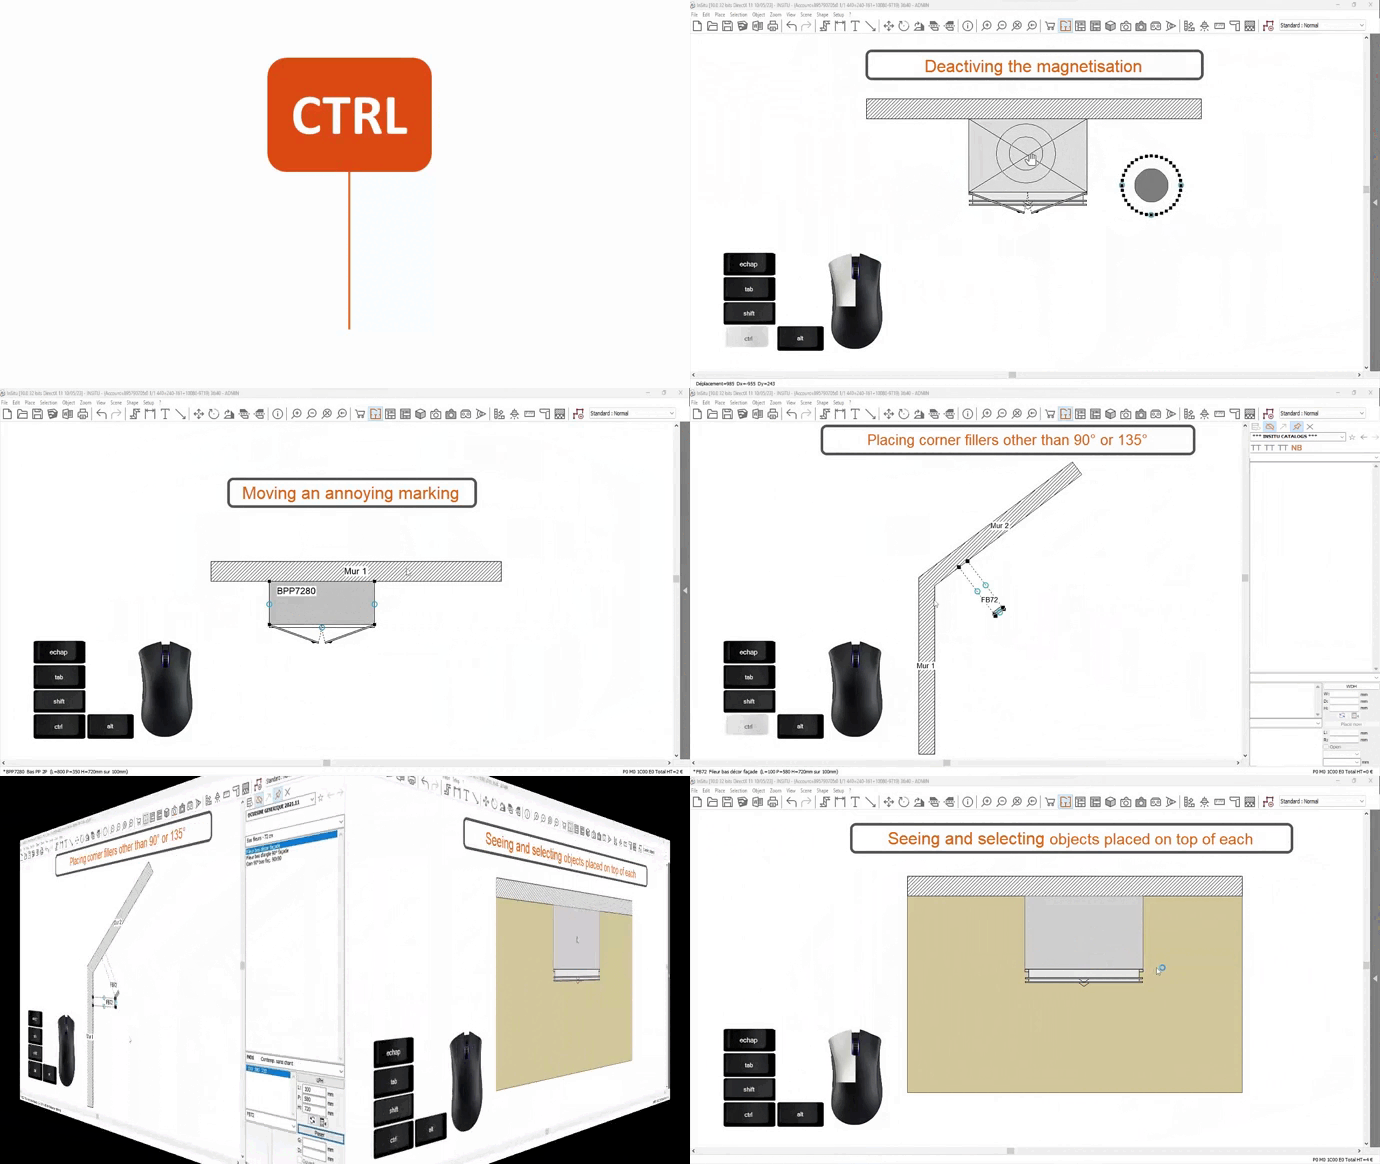
- | - Deactiving the magnetisation of an object: Select the element and keep the CTRL button pressed down, then drag and place the element in the desired spot. | ||
- Moving an annoying marking: Select the marking, keep the CTRL button pressed down and then left click to move the marking. | |||
- | - Placing angle fillers other than 90° or 135°: select a right angle filler in the manufacturer catalogue, keep the CTRL button pressed down and send the filler in the angle, then let go. Do the same for the second filler but this time, pivot it against the other wall (while still being in the angle). | ||
- | - Seeing and quickly selecting objects placed on top of each other: put the mouse cursor on the area where there are several elements and then CTRL + right click. | ||
<div align="center"> | <div align="center"> | ||
[[Image:Shiftorange.png|link=]] | [[Image:Shiftorange.png|link=]] | ||
| Line 32: | Line 32: | ||
<div align="center"> | <div align="center"> | ||
<p class="cadreimg gif"> | <p class="cadreimg gif"> | ||
[[Image: | [[Image:Raccourcishift_EN.gif|link=]] | ||
</p></div> | </p></div> | ||
- | - Duplicating an object: Select an element, then keep the Shift button pressed down + left click to move the copied object to wherever you would like. | ||
- | - Selecting several objects or several shape points: Select the first element (or shape point), keep Shift pressed down to select a second object (or shape point). Keep Shift pressed down until all the elements (or shape points) have been selected. | ||
- | - Placing an object on another without calculating heights: Select the element on which you would like to place another element. Keep the Shift button pressed down and, from the catalogue of your choice, drag and drop the article on top of the pre-selected element. Release the mouse. Using the move tool, reposition as needed. | ||
<div align="center"> | <div align="center"> | ||
| Line 46: | Line 46: | ||
<div align="center"> | <div align="center"> | ||
<p class="cadreimg gif"> | <p class="cadreimg gif"> | ||
[[Image: | [[Image:Raccourcialt_EN.gif|link=]] | ||
</p></div> | </p></div> | ||
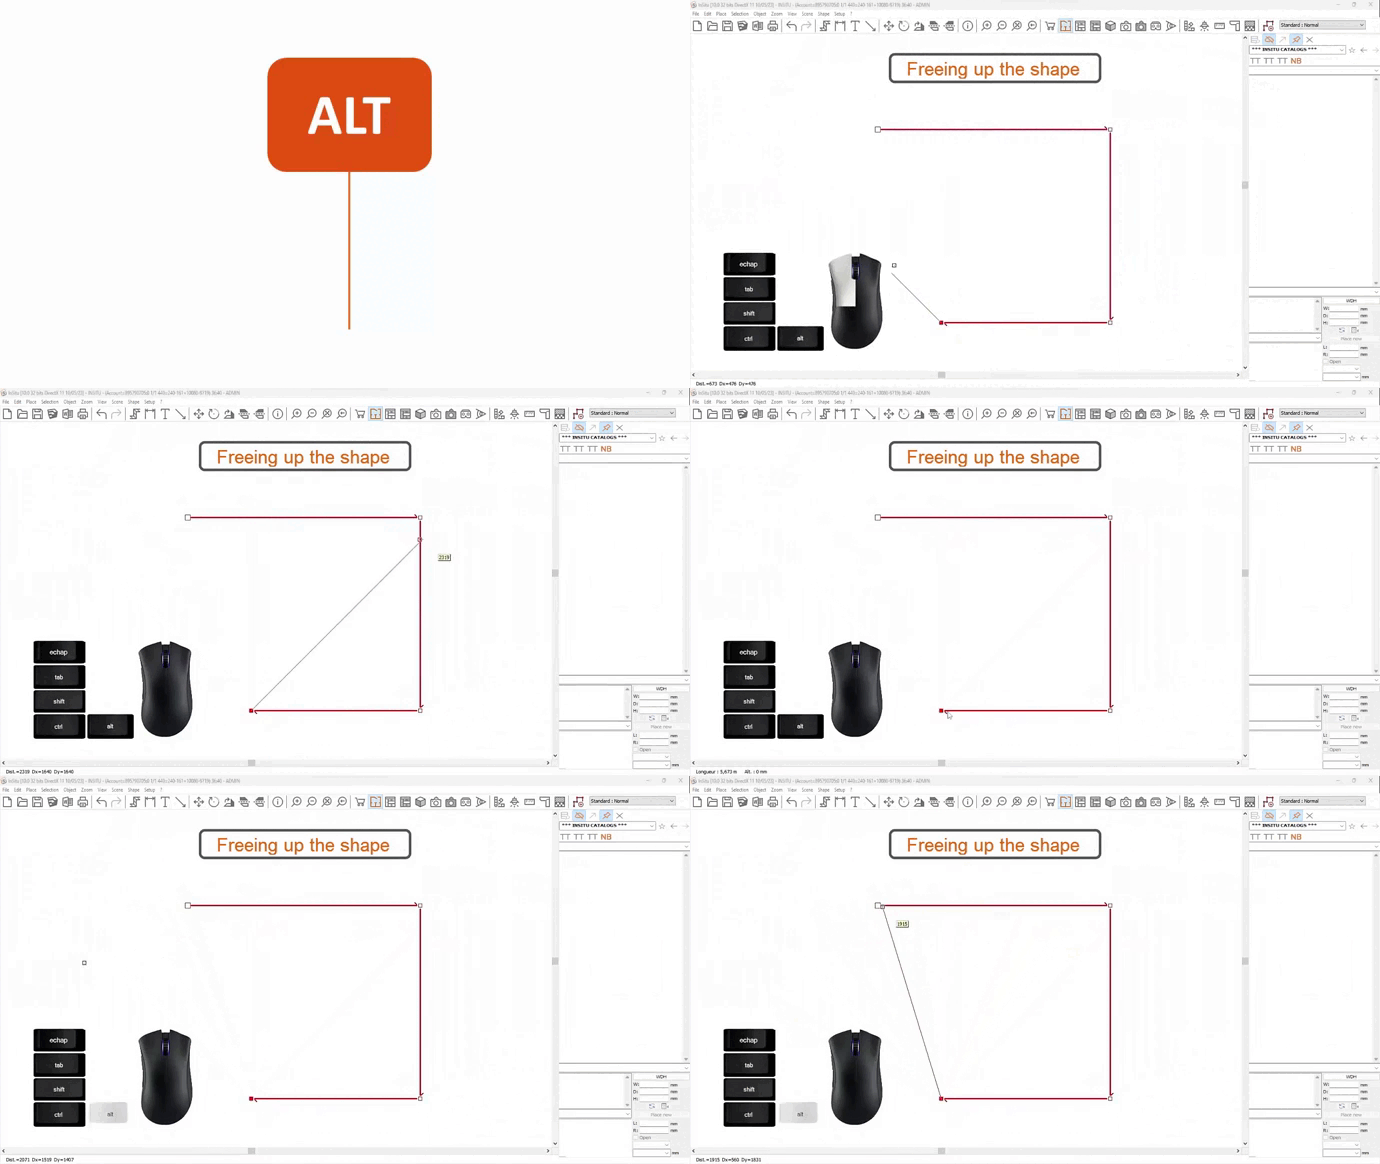
- | - Freeing up the drawing of a shape: when drawing a shape, it is drawn at 45° angles. Keep the Alt button pressed down while it is being drawn will allow you to remove this block. | ||
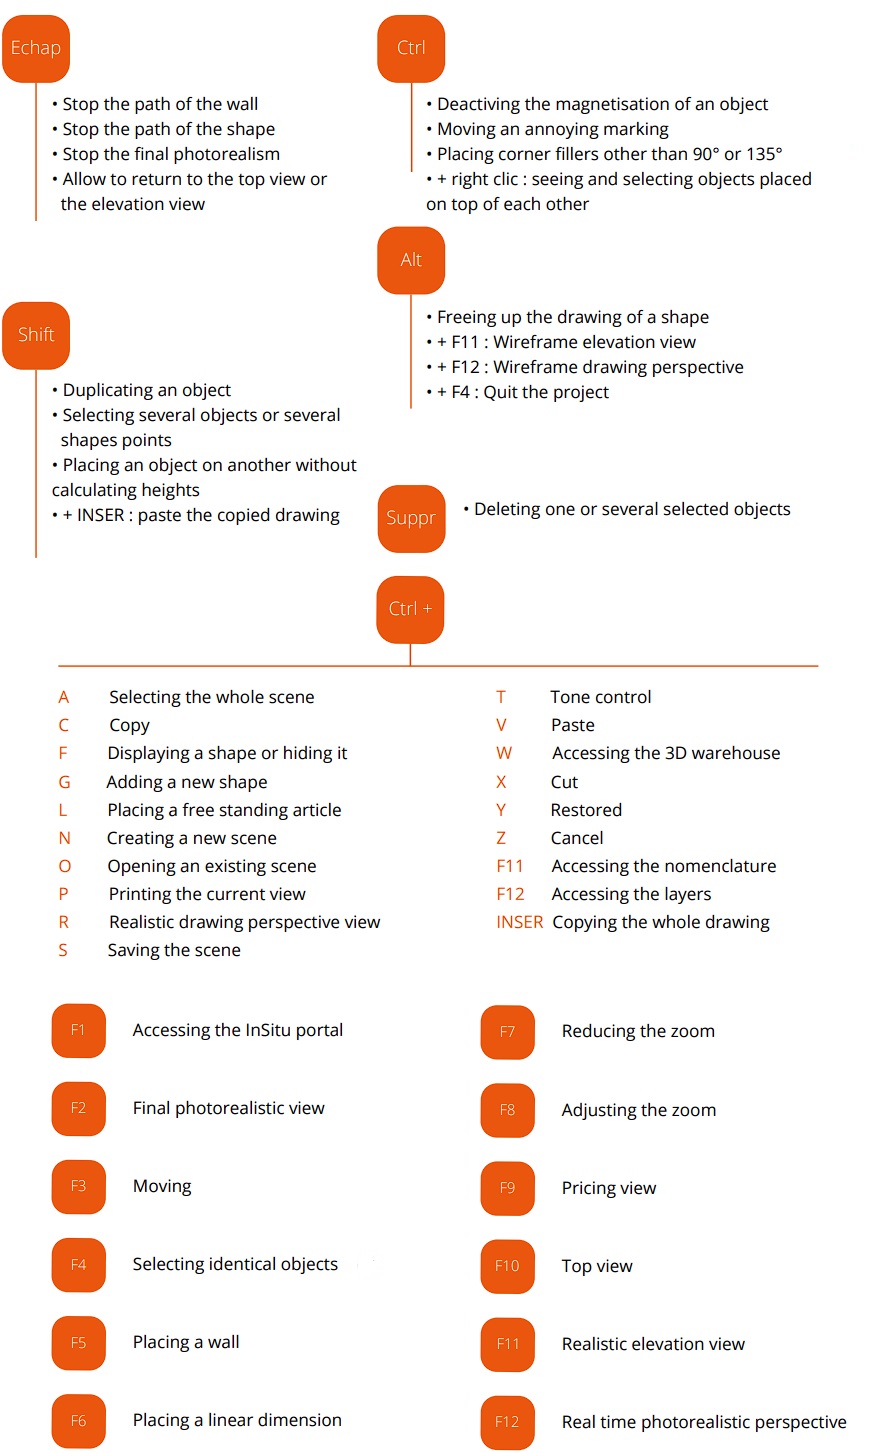
There are a number of other shortcuts too. Here is the list: | |||
<div align="center"> | <div align="center"> | ||
<p class="cadreimg gif"> | <p class="cadreimg gif"> | ||
[[Image: | [[Image:raccourciEN.jpg|link=]] | ||
</p></div> | </p></div> | ||
| Line 71: | Line 71: | ||
</table> | </table> | ||
<span class="btnretour">[[#top| | <span class="btnretour">[[#top|Back top of page]]</span> <span class="btnhome">[[Key tools (measure, move…)|Next step]]</span> | ||
Latest revision as of 08:58, 6 August 2024
Shortcuts and key buttons in InSituLike most software, InSitu has many shortcuts and key buttons (hotkeys). These can help you do lots of things, such as duplicating an element, changing the direction of an element, selecting 2 elements, etc. We will now list these hotkeys with the help of case studies.
- Deactiving the magnetisation of an object: Select the element and keep the CTRL button pressed down, then drag and place the element in the desired spot. - Moving an annoying marking: Select the marking, keep the CTRL button pressed down and then left click to move the marking. - Placing angle fillers other than 90° or 135°: select a right angle filler in the manufacturer catalogue, keep the CTRL button pressed down and send the filler in the angle, then let go. Do the same for the second filler but this time, pivot it against the other wall (while still being in the angle). - Seeing and quickly selecting objects placed on top of each other: put the mouse cursor on the area where there are several elements and then CTRL + right click.
- Duplicating an object: Select an element, then keep the Shift button pressed down + left click to move the copied object to wherever you would like. - Selecting several objects or several shape points: Select the first element (or shape point), keep Shift pressed down to select a second object (or shape point). Keep Shift pressed down until all the elements (or shape points) have been selected. - Placing an object on another without calculating heights: Select the element on which you would like to place another element. Keep the Shift button pressed down and, from the catalogue of your choice, drag and drop the article on top of the pre-selected element. Release the mouse. Using the move tool, reposition as needed.
- Freeing up the drawing of a shape: when drawing a shape, it is drawn at 45° angles. Keep the Alt button pressed down while it is being drawn will allow you to remove this block.
There are a number of other shortcuts too. Here is the list:
|
|


