Non Web-Based Furniture(internet connection not required): Difference between revisions
No edit summary |
No edit summary |
||
| (One intermediate revision by the same user not shown) | |||
| Line 1: | Line 1: | ||
<table width="100%"> | |||
<tr> | |||
<td width="80%"> | |||
<!-- contenu --> | |||
<div align="center"> | |||
<p class="cadrevideo"> | |||
<youtube width="500" height="300"> | |||
https://www.youtube.com/watch?v=19FU3c9Zkgw&list=PL7MrU2icgiqG3b9led7lcIQy7_dyRvN-_&index=5 | |||
</youtube> | |||
<br>Voir le tutoriel vidéo | |||
</p></div> | |||
'''<big> Placing low furniture </big>''' | '''<big> Placing low furniture </big>''' | ||
Latest revision as of 13:01, 19 April 2023
|
Placing low furniture
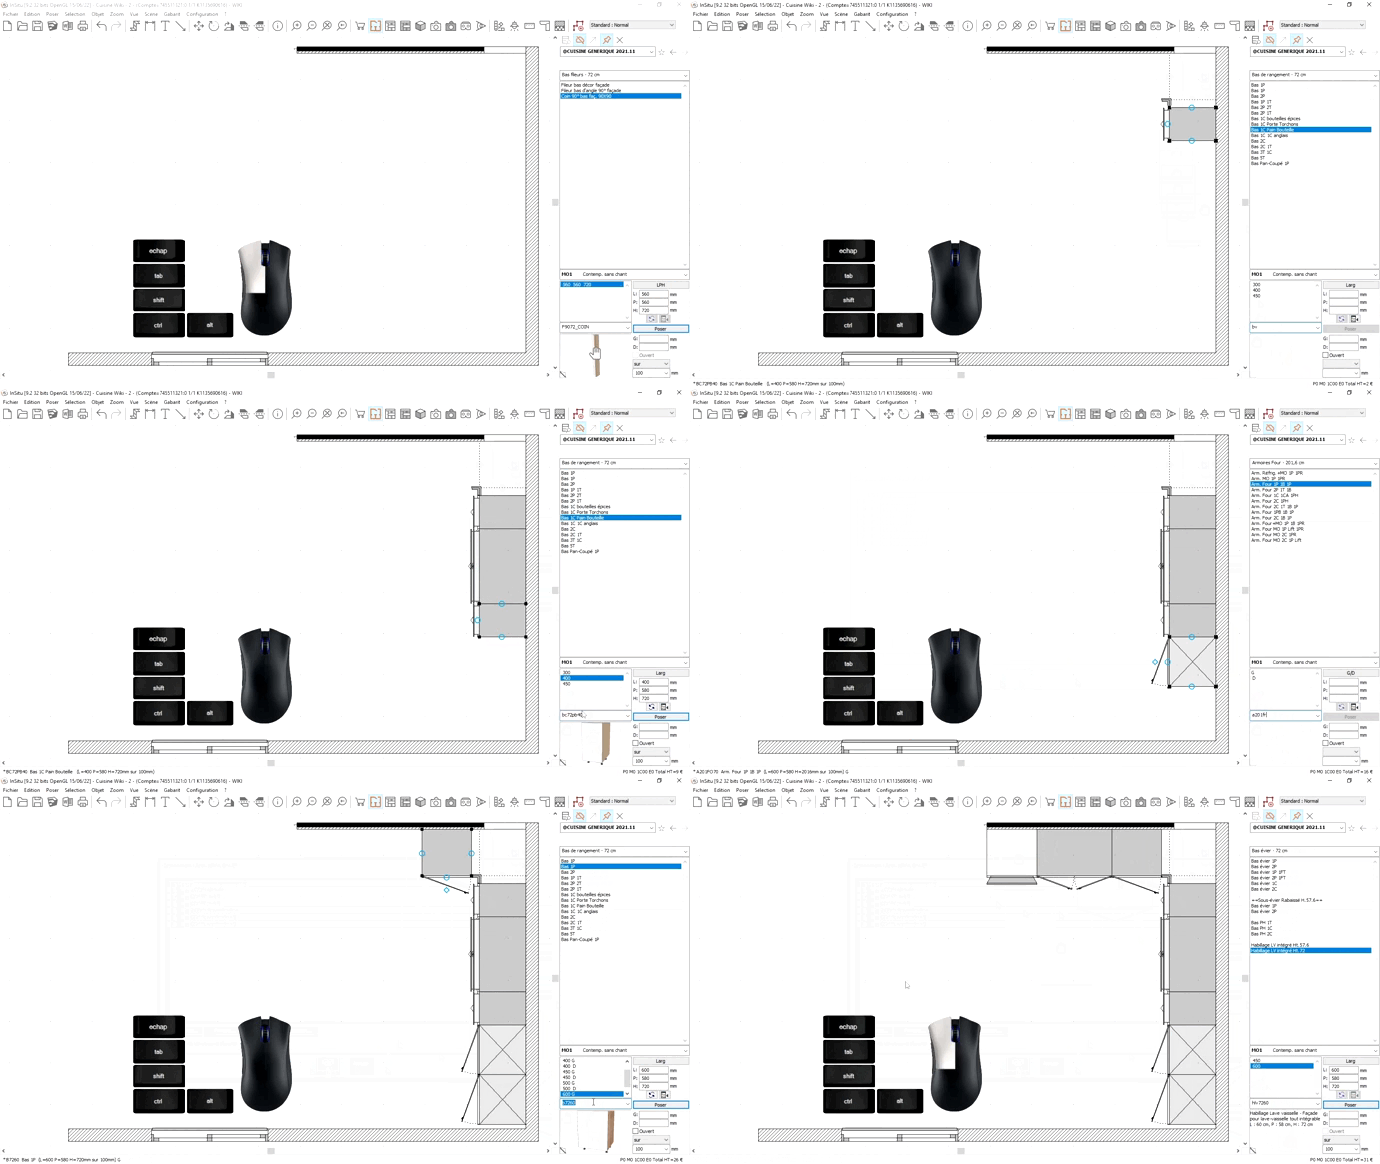
The method for placing furniture is the same as for placing constraints (doors, windows, etc.). There is however a second method for searching for an article in the current catalogue: simply typing in its reference. One after the other, we are going to place the pieces of furniture that make up the layout of the room. To do so: 1. Choose the catalogue named @GENERIC KITCHEN 2021.11, just like in the previous section. 2 Begin your layout with an angle, either by placing an angle filler or a piece of angle furniture. 3. Type the reference of the furniture you wish to place on your keyboard. If you don't know the reference, search for the article in the drop down menu. 4. In the previsualisation graphic zone of the chosen article, click with your left mouse button and keep it pressed down. The mouse cursor will transform into the silhouette of a hand. 5. Don't try to turn the silhouette or place it very precisely in the corner. Just make sure that it covers each of the two walls and then release the left mouse button. InSitu will wedge the piece of furniture perfectly in the corner. Repeat the procedure from step 3 for each piece of low furniture.
Note: The furniture's dimensions are automatically displayed thanks to the graphic options in the Setup drop down menu: Setup > Graphic > Options > Automatic dimensions in top view. The furniture is numbered in the order that it was placed thanks to markings. You can replace these numbers by references thanks to the Scene drop down menu: Scene > Mark... > Reference catalogue
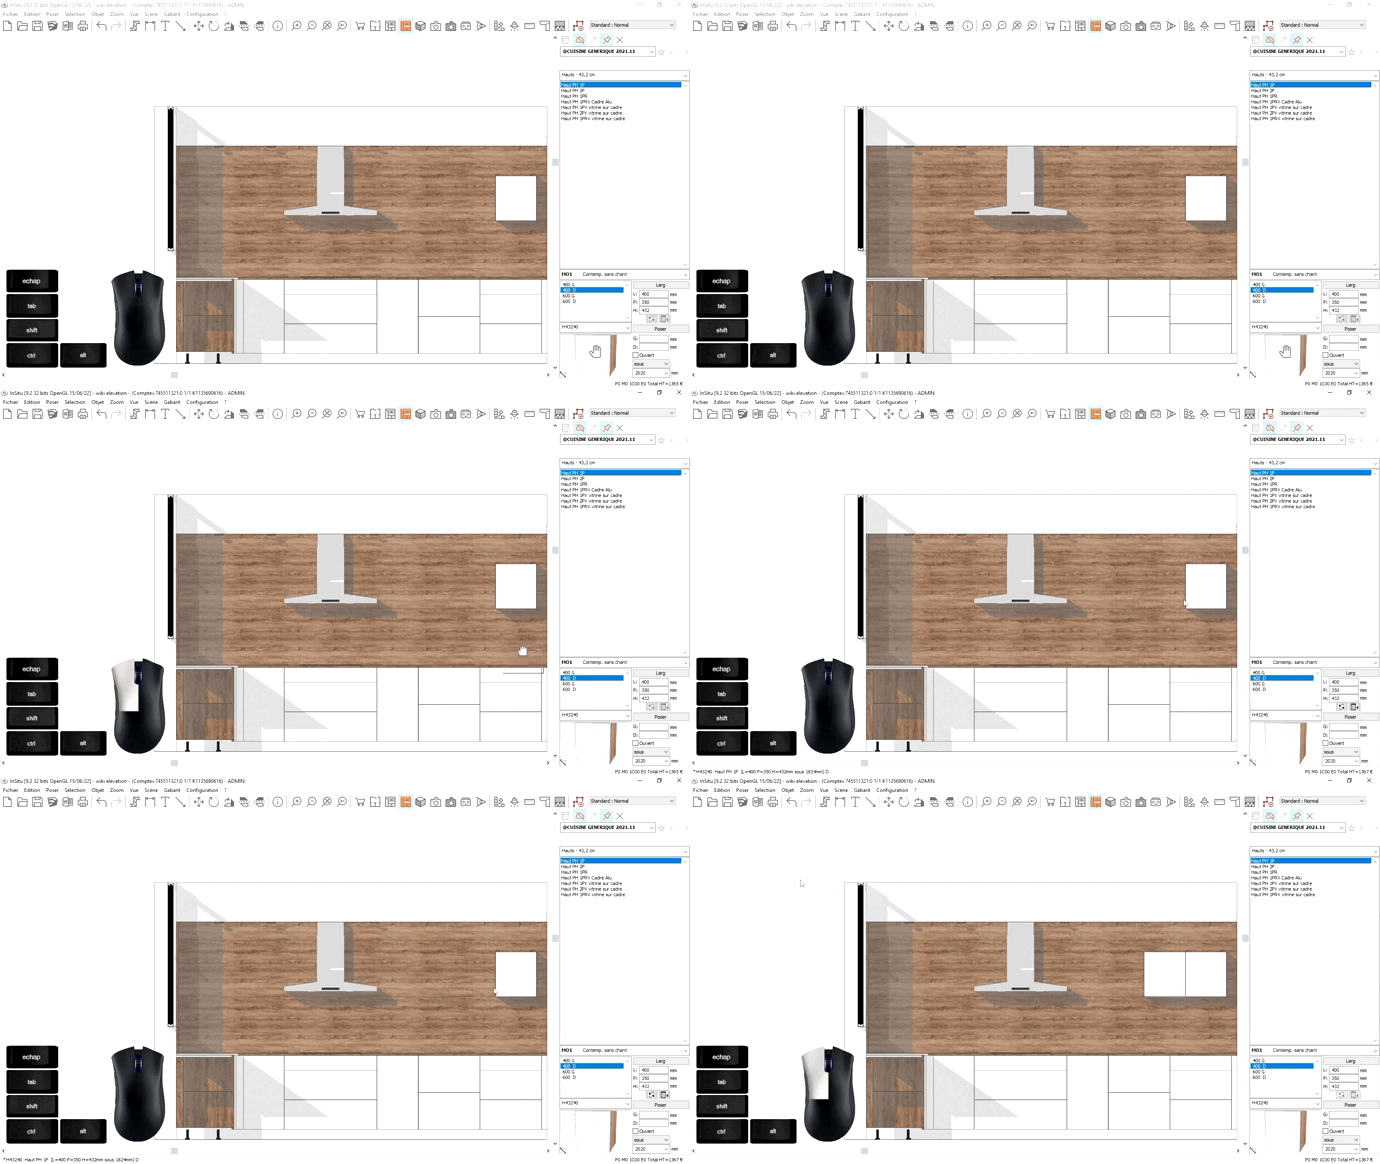
We have placed the low furniture and the wardrobe in top view. We could do the same for the high furniture (cabinets) but instead, we will see how it can be just as easy to place furniture in elevation, which is to say in the vertical plan of a wall for example. Let's begin by putting ourselves into an elevation perspective. To do so, double click on a wall or select a wall and then click on View | Realistic elevation or use the shortcut icon.
2. In the previsualisation graphic zone of the chosen article, click with your left mouse button and keep it pressed down. The mouse cursor will transform into the silhouette of a hand. 3.' Slide the silhouette to where you want it and release the left mouse button. 4. Proceed in the same fashion with the rest of the furniture, each time " covering " the last piece of furniture you placed. You have now finished placing the furniture.
|
|


