Perspective views: Difference between revisions
No edit summary |
No edit summary |
||
| (2 intermediate revisions by 2 users not shown) | |||
| Line 3: | Line 3: | ||
<td width="80%" valign="top"> | <td width="80%" valign="top"> | ||
<!-- contenu --> | <!-- contenu --> | ||
<h1 class="title_page">Perspective views</h1> | |||
[[Image:LogoInfo.png|link=]] <strong>Important</strong> | [[Image:LogoInfo.png|link=]] <strong>Important</strong> | ||
<br/> | <br/> | ||
Visualisation problems? If you wish to hide a bothersome wall or, do the opposite and disable this option, go to the <strong>[[ | Visualisation problems? If you wish to hide a bothersome wall or, do the opposite and disable this option, go to the <strong>[[Setting up graphic options|Setting up graphic options]]</strong> | ||
| Line 12: | Line 13: | ||
<div align="center"> | <div align="center"> | ||
<p class="cadreimg"> | <p class="cadreimg img-full"> | ||
[[Image:Vuepersepective_FR.png | [[Image:Vuepersepective_FR.png|link=]] | ||
</p></div> | </p> | ||
<br/> | |||
</div> | |||
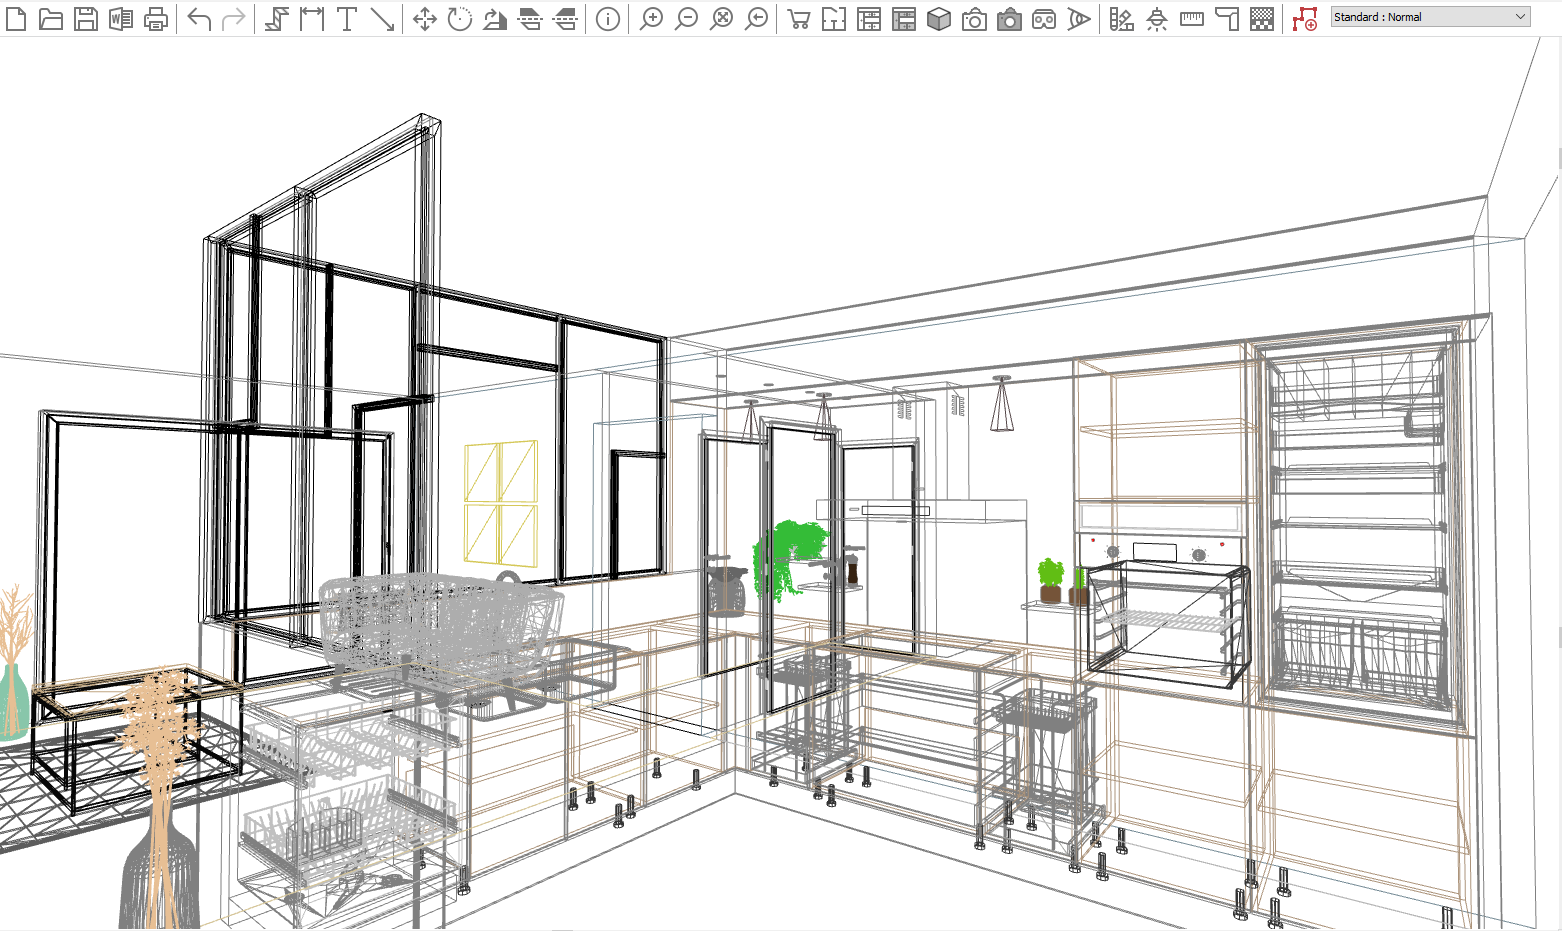
The wireframe drawing perspective is a 3D view that allows you to visualise the outlines and the fronts of the elements placed in the scene. | The wireframe drawing perspective is a 3D view that allows you to visualise the outlines and the fronts of the elements placed in the scene. | ||
| Line 22: | Line 25: | ||
<div align="center"> | <div align="center"> | ||
<p class="cadreimg"> | <p class="cadreimg img-full"> | ||
[[Image:Vuepersepective2_FR.png | [[Image:Vuepersepective2_FR.png|link=]] | ||
</p></div> | </p> | ||
<br/> | |||
</div> | |||
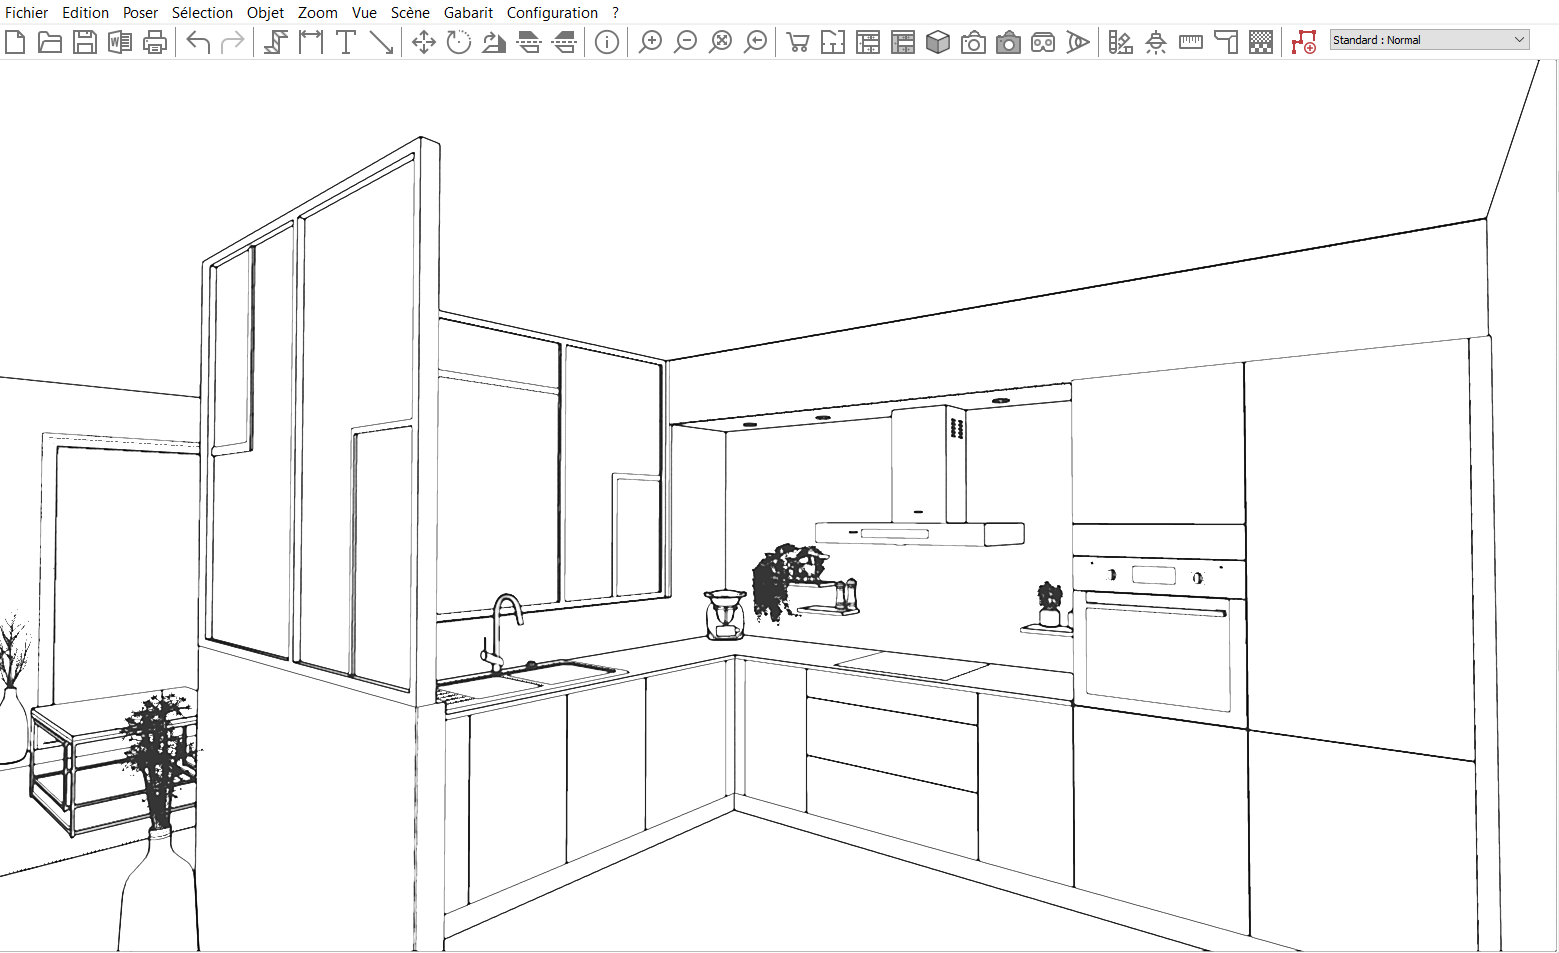
The hidden faces drawing perspective is a 3D view that shows the outline of each element without being transparent. Therefore, you can see the outside of the elements and their fronts but not the inner fittings. | The hidden faces drawing perspective is a 3D view that shows the outline of each element without being transparent. Therefore, you can see the outside of the elements and their fronts but not the inner fittings. | ||
| Line 32: | Line 37: | ||
<div align="center"> | <div align="center"> | ||
<p class="cadreimg"> | <p class="cadreimg img-full"> | ||
[[Image:Vuepersepective3_FR.png | [[Image:Vuepersepective3_FR.png|link=]] | ||
</p></div> | </p> | ||
<br/> | |||
</div> | |||
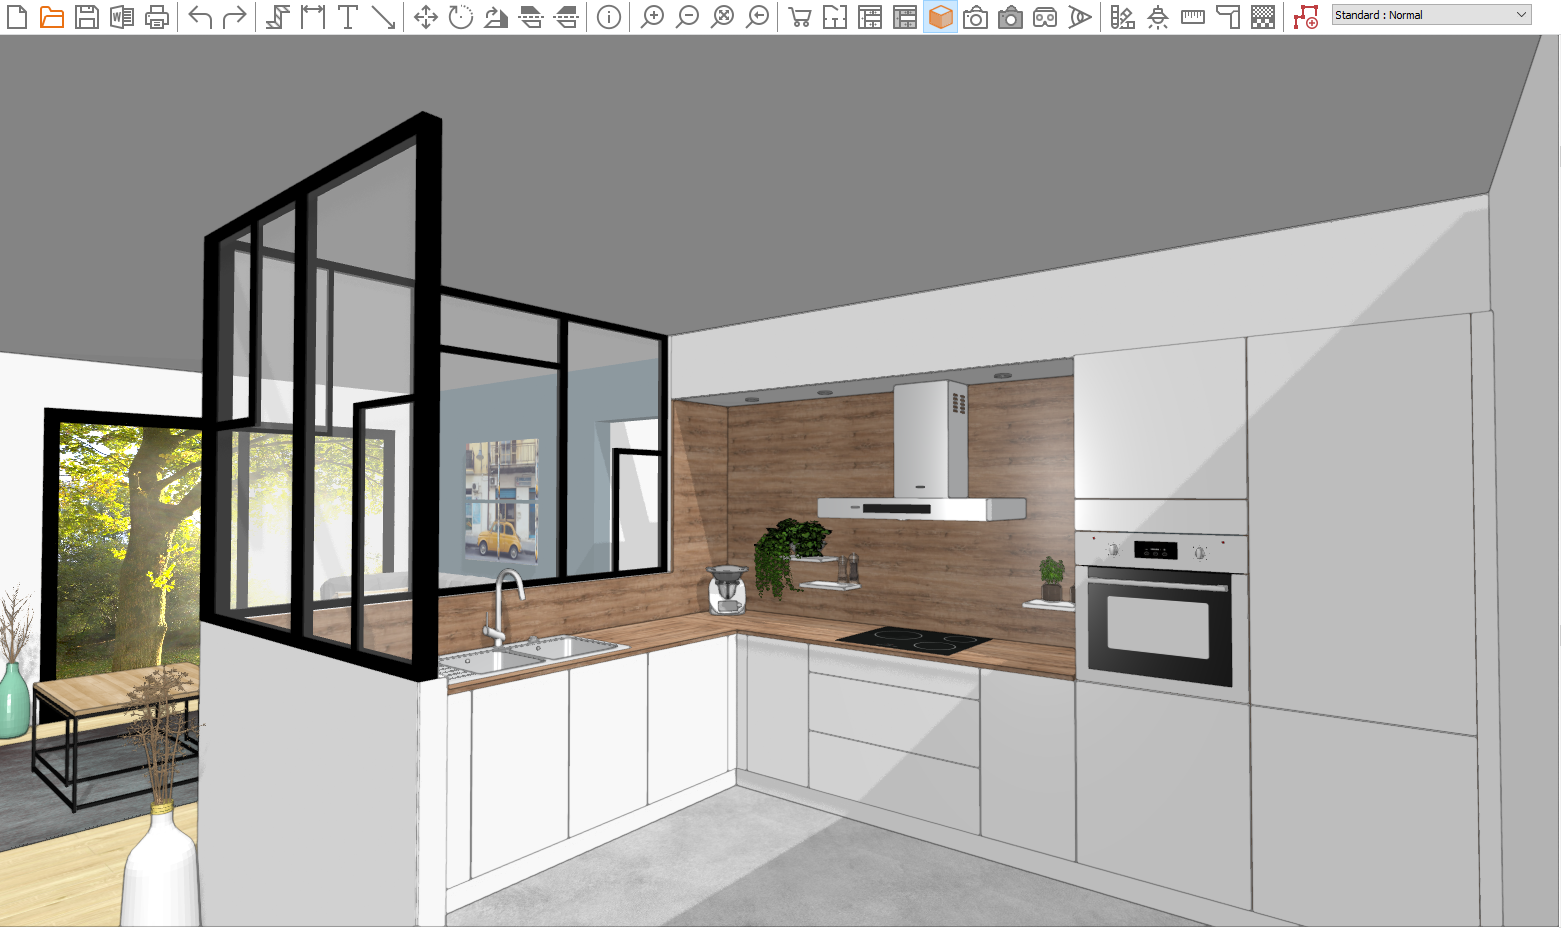
The realistic drawing perspective is a 3D view with defined colours in teh finishes of teh walls, the furniture... It gives you a 3D overview of the final result. | The realistic drawing perspective is a 3D view with defined colours in teh finishes of teh walls, the furniture... It gives you a 3D overview of the final result. | ||
| Line 89: | Line 96: | ||
</table> | </table> | ||
<span class="btnretour">[[#top| | <span class="btnretour">[[#top|Back top of page]]</span> <span class="btnhome">[[Realistic drawing perspective|Next step]]</span> | ||
Latest revision as of 14:25, 7 August 2024
Perspective views
The wireframe drawing perspective is a 3D view that allows you to visualise the outlines and the fronts of the elements placed in the scene.
The hidden faces drawing perspective is a 3D view that shows the outline of each element without being transparent. Therefore, you can see the outside of the elements and their fronts but not the inner fittings.
The realistic drawing perspective is a 3D view with defined colours in teh finishes of teh walls, the furniture... It gives you a 3D overview of the final result.
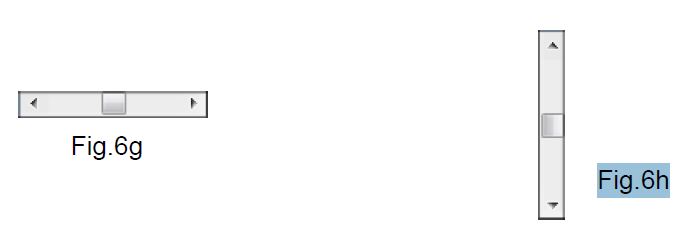
The point of the view of the perspective can be changed with the help of the scrollbars located to the right and to the bottom of the drawing. The horizontal scrollbar at the bottom of the drawing allows you to turn around the scene. (Fig.6g) The vertical scrollbar located to the right of the drawing allow you to access bird's eye views. (Fig.6h)
To slightly rotate the point of view Click on one of the two arrows at the ends of the scrollbar.
To considerably rotate the point of view Click in the empty areas between the scrollbar's arrows and the slider.
To dynamically adjust the point of view 1 - Bring to mouse cursor to the scrollbar. 2 - Left click on the mouse and keep it pressed down. 3 - Gently slide the slider along the scrollbar and see how the point of view changes. 4 - Release the left mouse button when you are satisfied with the new point of view. The perspective view instantly appears on screen.
|
|


