Final photorealistic perspective: Difference between revisions
No edit summary |
No edit summary |
||
| (4 intermediate revisions by 2 users not shown) | |||
| Line 3: | Line 3: | ||
<td width="80%" valign="top"> | <td width="80%" valign="top"> | ||
<!-- contenu --> | <!-- contenu --> | ||
[[ | <h1 class="title_page"> Final photorealistic perspective</h1> | ||
[[Image:LogoInfo.png|link=]] <strong>Important</strong> | |||
<br/> | <br/> | ||
Visualisation problems? If you wish to hide a bothersome wall or, do the opposite and disable this option, go to the <strong>[[ | Visualisation problems? If you wish to hide a bothersome wall or, do the opposite and disable this option, go to the <strong>[[Setting up graphic options|Setting up graphic options]]</strong> | ||
| Line 25: | Line 27: | ||
<div align="center"> | <div align="center"> | ||
<p class="cadreimg"> | <p class="cadreimg"> | ||
[[ | [[Image:Vuephotoreelfinal2_ENG.png|link=]] | ||
</p></div> | </p></div> | ||
| Line 35: | Line 37: | ||
It is worth noting that you can change the default number of iterations via the '''Scene''' drop down menu, then '''Photorealism'''. In the '''Final photorealism''' tab, the number of iterations will be displayed, which you can change. If you want this change to apply every time, remember to press the '''By default''' button. | It is worth noting that you can change the default number of iterations via the '''Scene''' drop down menu, then '''Photorealism'''. In the '''Final photorealism''' tab, the number of iterations will be displayed, which you can change. If you want this change to apply every time, remember to press the '''By default''' button. | ||
[[Fichier:LogoInfo.png|link=]] If you wish to change the number of iterations, go to '''Scene | Photorealism''' and then to the '''Final photorealism''' tab and change the number of iterations from 16 to whatever you prefer. | [[Fichier:LogoInfo.png|link=]] If you wish to change the number of iterations, go to '''Scene | Photorealism''' and then to the '''Final photorealism''' tab and change the number of iterations from 16 to whatever you prefer. | ||
<div align="center"> | <div align="center"> | ||
<p class="cadreimg"> | <p class="cadreimg"> | ||
[[ | [[Image:Vuephotoreelfinal3_ENG.png|link=]] | ||
</p></div> | </p></div> | ||
'''<big>The temperature</big>''' | '''<big>The temperature</big>''' | ||
This allows you to set the scene's colour ambiance. | This allows you to set the scene's colour ambiance. | ||
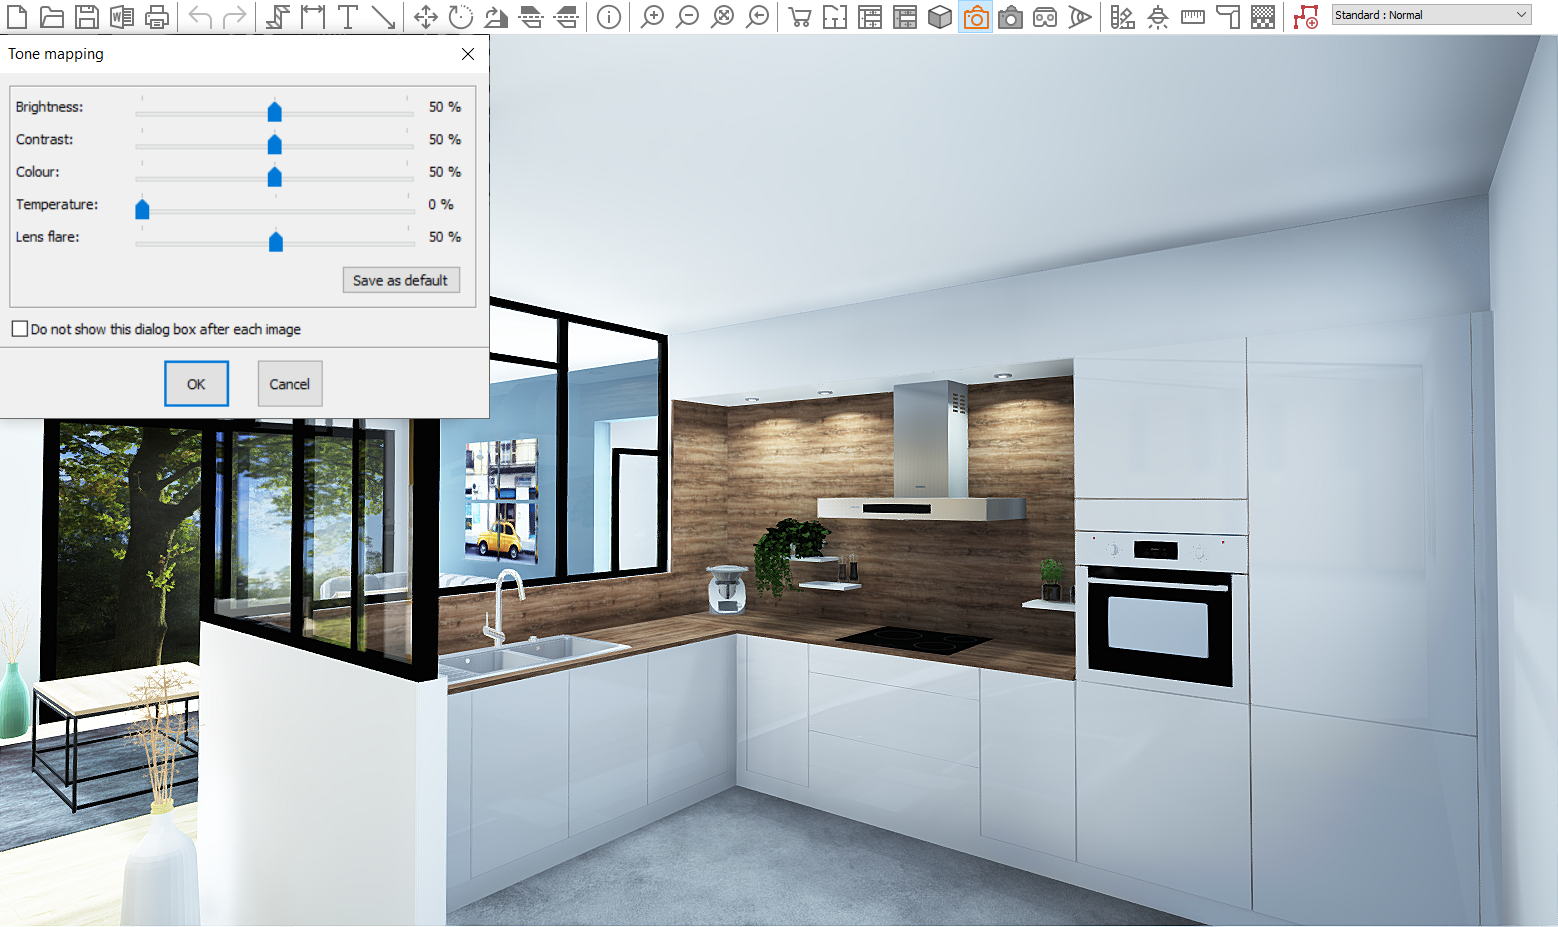
The further the slider is to the left, the more cold, blue-dominated tones the scene will have. | The further the slider is to the left, the more cold, blue-dominated tones the scene will have. | ||
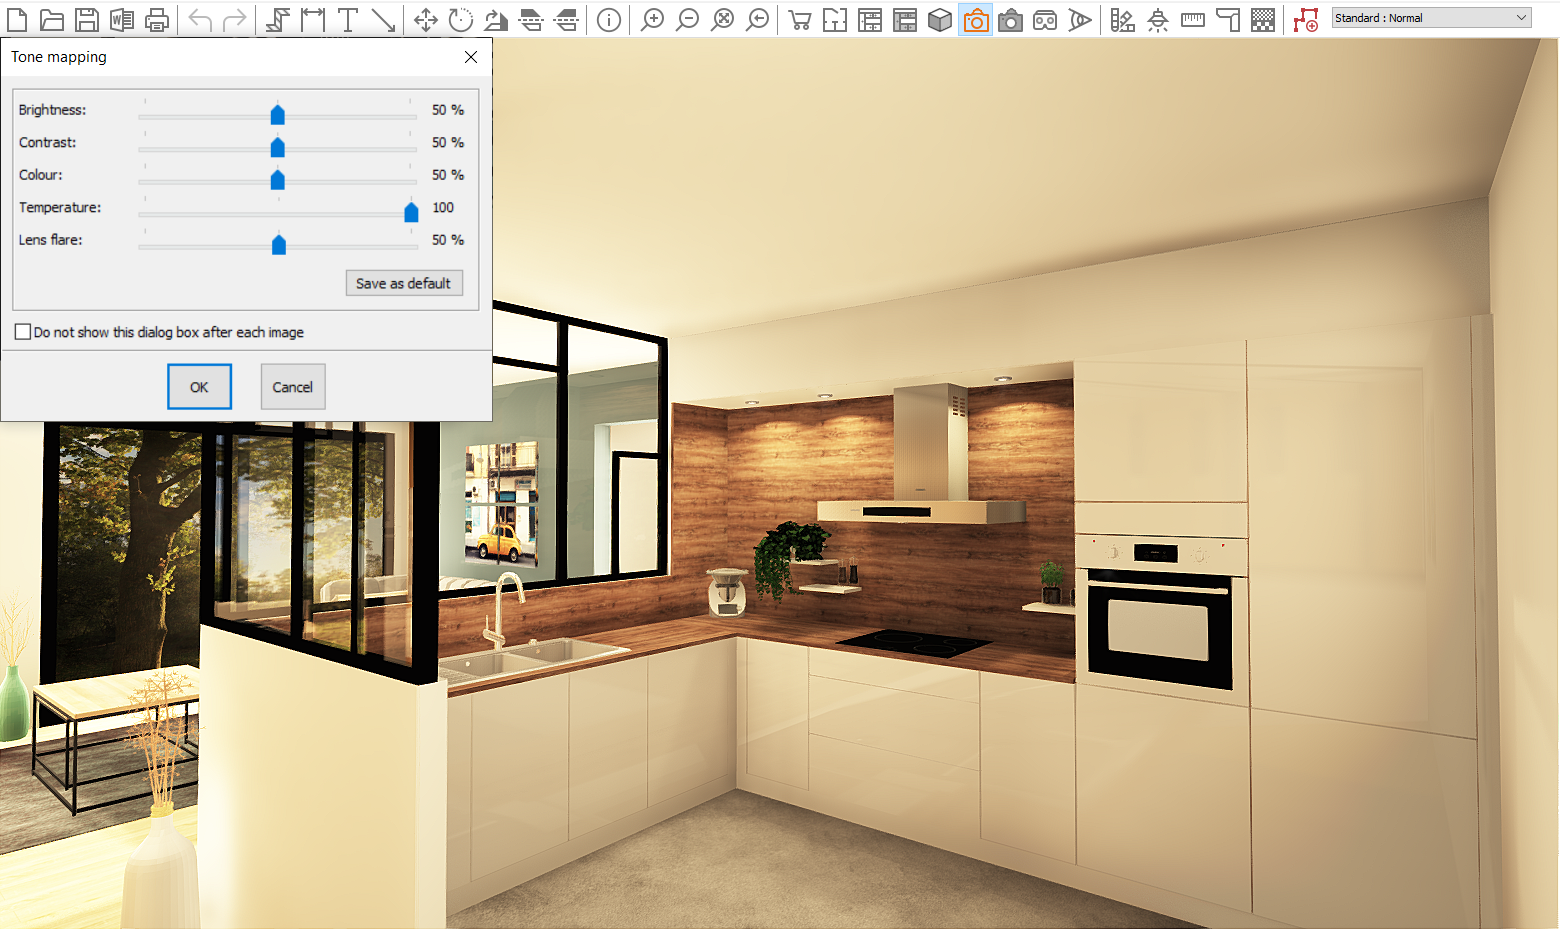
The further the slider is to the right, the more warm, yellow-dominated tones the scene will have. | The further the slider is to the right, the more warm, yellow-dominated tones the scene will have. | ||
<div align="center"> | <div align="center"> | ||
<p class="cadreimg"> | <p class="cadreimg img-full"> | ||
[[ | [[Image:Vuephotoreelfinal4_ENG.png|link=]] | ||
<br/> | <br/> | ||
[[Image:Vuephotoreelfinal5_ENG.png|link=]] | |||
</p> | |||
<br/> | |||
</div> | |||
| Line 82: | Line 79: | ||
</tr> | </tr> | ||
</table> | </table> | ||
<span class="btnretour">[[#top| | <span class="btnretour">[[#top|Back top of page]]</span> <span class="btnhome">[[Virtual reality view|Next step]]</span> | ||
Latest revision as of 09:15, 21 August 2024
Final photorealistic perspective
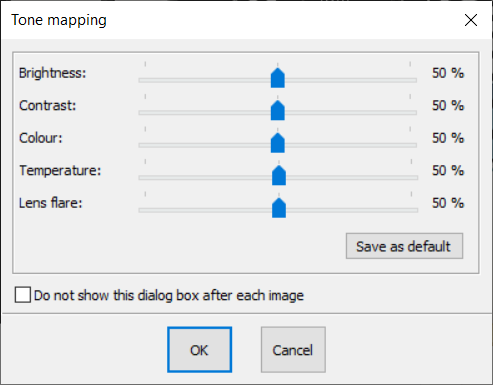
The image is produced after successive calculations of iterations that converge towards the optimal quality. By default, the calculation stops after its sixteenth iteration. Then, a dialog box will appear, allowing you to play with the sliders and alter the intensity, the contrast, the colour, the temperature and the luminous halo.
If you no longer want this dialog box to appear, simply go to View | Tone mapping and tick the Do not show this dialog box after each image.
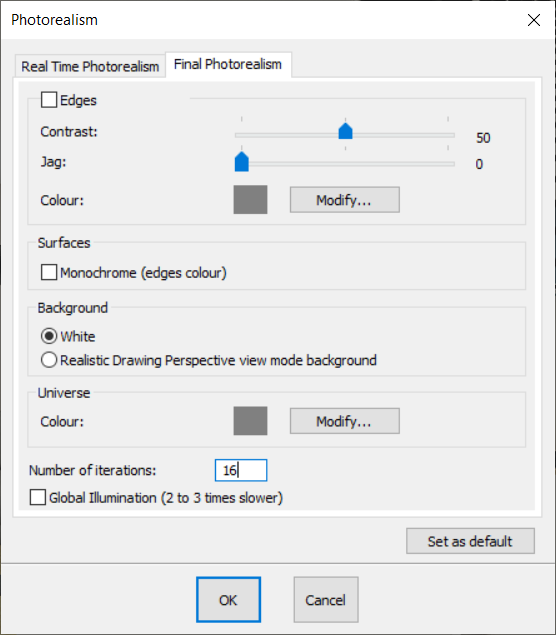
To come back on the calculation of an iteration, all you need to do is press on the F2 key. The software will then perform calculations for an infinite number of iterations. You will need to end these calculations by pressing on the ESCAPE key. It is worth noting that you can change the default number of iterations via the Scene drop down menu, then Photorealism. In the Final photorealism tab, the number of iterations will be displayed, which you can change. If you want this change to apply every time, remember to press the By default button.
|
|


