Customising the tool bar: Difference between revisions
Jump to navigation
Jump to search
No edit summary |
No edit summary |
||
| (3 intermediate revisions by 2 users not shown) | |||
| Line 4: | Line 4: | ||
<td width="80%" align="left"> | <td width="80%" align="left"> | ||
<!-- contenu --> | <!-- contenu --> | ||
<h1 class="title_page">Customising the tool bar</h1> | |||
<div align="center"> | <div align="center"> | ||
| Line 18: | Line 19: | ||
<div align="center"> | <div align="center"> | ||
<p class="cadreimg"> | <p class="cadreimg"> | ||
[[Image: | [[Image:ConfigPersoBarreOutilsENG2.png|link=]] | ||
</p> | </p> | ||
<br/> | <br/> | ||
| Line 42: | Line 43: | ||
</table> | </table> | ||
<span class="btnretour">[[#top| | <span class="btnretour">[[#top|Back top of page]]</span> <span class="btnhome">[[Setting up pricing options|Next Step]]</span> | ||
Latest revision as of 14:48, 6 August 2024
Customising the tool bar
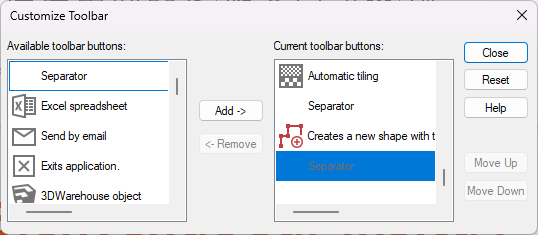
To add an icon, select the icon you wish to add in the "Available toolbar buttons" section and then choose the icon that you want to put the new icon in front of in the "Current toolbar buttons" section. Then, click "Add". To remove an icon, select the icon you wish to remove in the "Current toolbar buttons" section and then click on "Remove". To move an icon, select the icon you wish to move in the "Current toolbar buttons" section and then press "Move up" or "Move down" as many times as is necessary.
|
|

