What is a shape?: Difference between revisions
No edit summary |
No edit summary |
||
| (3 intermediate revisions by the same user not shown) | |||
| Line 27: | Line 27: | ||
<div class="flex y_center cadreimg wrap"> | <div class="flex y_center cadreimg wrap"> | ||
<div style="width:28%;" class="img-full"> | <div style="width:28%;" class="img-full"> | ||
[[Image: | [[Image:gabarit2_EN.png|link=]] | ||
</div> | </div> | ||
| Line 36: | Line 36: | ||
<div> | <div> | ||
<p>'''Generar'''</p> | <p>'''Generar'''</p> | ||
[[Image: | [[Image:gabarit4_EN.png|link=]] | ||
</div> | </div> | ||
<div> | <div> | ||
<p class="txt-center">'''Cortar '''</p> | <p class="txt-center">'''Cortar '''</p> | ||
[[Image: | [[Image:gabarit3_EN.png|link=]] | ||
</div> | </div> | ||
<div> | <div> | ||
<p class="txt-center">'''Combinar'''</p> | <p class="txt-center">'''Combinar'''</p> | ||
[[Image: | [[Image:gabarit6_EN.png|link=]] | ||
</div> | </div> | ||
| Line 55: | Line 55: | ||
<div> | <div> | ||
<p>'''Editar'''</p> | <p>'''Editar'''</p> | ||
[[Image: | [[Image:gabarit5_EN.png|link=]] | ||
</div> | </div> | ||
<div> | <div> | ||
<p class="txt-center">'''Puntos'''</p> | <p class="txt-center">'''Puntos'''</p> | ||
[[Image: | [[Image:gabarit7_EN.png|link=]] | ||
</div> | </div> | ||
| Line 88: | Line 88: | ||
<div align="center"> | <div align="center"> | ||
<p class="cadreimg"> | <p class="cadreimg"> | ||
[[ | [[Image:gabarit8_EN.png|link=]] | ||
</p></div> | </p></div> | ||
Latest revision as of 10:24, 8 December 2023
|
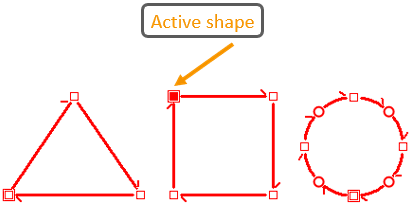
What is a shape? Shapes are one of the key points of the InSitu software. They are used to create specifically shaped work plans, to create projects with complex rooms, to place wall tiling, to put ceilings on lofts... and a lot more. Shapes can be created in top view, in elevation and, in some rarer cases, in perspective views. Be aware that shapes function clockwise. This will help you avoid design errors, namely while placing walls. A shape is made up of a series of dots represented by little squares, the first of which is slightly bigger than the rest. These dots are linked by lines. The ends of each line are marked with an appendage to tell the start of each line from the end. It will also help you easily identify the order of the dots in a shape, and in turn its direction. A scene's shapes do not appear in the prints and are neither saveable nor moveable. If there are several shapes in the scene, the active shape is the last shape that was placed or selected. You will be able to recognise which one is active thanks to one of these red dots.
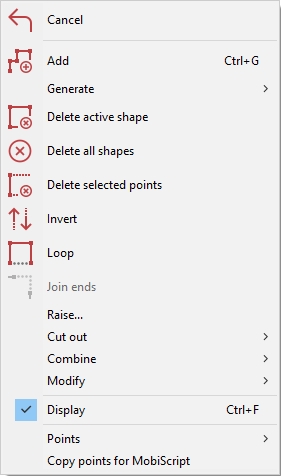
Here are all shape features that we will go through together in this course:
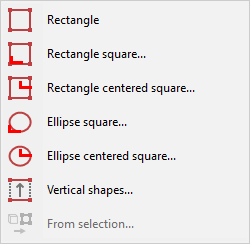
Generar
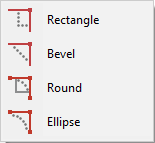
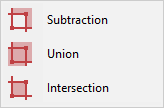
Cortar
Combinar
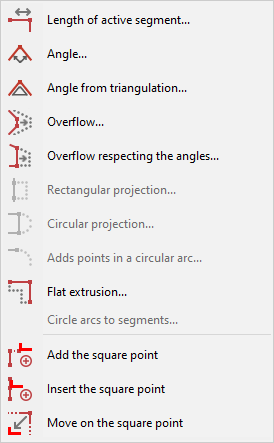
Editar
Puntos
Constructing a shape 1 - Select Shape | Add. The mouse cursor will transform into a little square. This lets you know that you can start. 2 - Bring the mouse cursor to the shape's starting spot. Left click to confirm. 3 - .A window then appears prompting you to enter the length of the line and the value of the angle. 4 - Using the mouse, indicate the direction that you the line to be drawn in. Release the mouse and, using the keyboard, enter the length of the line. Press on ENTER to confirm.
5 - Repeat the fourth step for the next lines. 7 - To stop making the shape, bring the mouse cursor to the last dot for the shape and click on the left mouse button or on the ESC button.
i Notes You can turn the next line of a shape by 45 degrees to the right (or to the left) by clicking on the PAGE UP button (or the PAGE DOWN button). If you wish to delete the shape's last dot, right click or press on the backspace key, usually symbolised by an arrow to the left. You can go back as many times as you want in a row and eventually, when you get to the first dot, you will cancel the creation of the shape. If you want to continue creating a shape, you can double click on the first or last dot of the shape and add dots in the method presented in step 5.
1 - Select Shape | Generate | Rectangle. The mouse cursor will change shape. 2 - Drag a rectangle with the mouse to define the shape you wish to create. To do so, bring the mouse cursor to a corner of the rectangle, left click and keep it pressed down. Then, move the mouse cursor to the opposite corner and release the left mouse button.
Cancel your last action relating to the shape Select Shape | Cancel. i This cancel function only has one level; meaning that if you click on it a second time, the shapes will revert back to their initial position. Click it a third time and they will all disappear again.
|
|
