Web-Based Constraints (internet connection required)
|
Placing and positioning constraints with the new web-based catalogue (Internet connection required)'
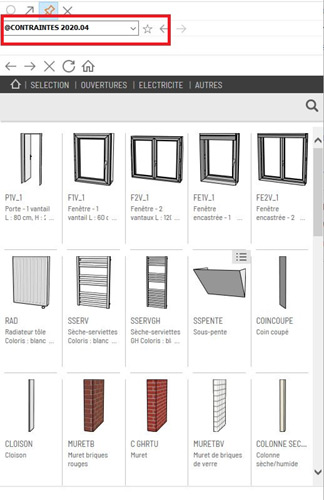
Example: placing a window 1. Choose the catalogue named @CONSTRAINTS 2020,04, which contains the window we wish to place. To do so, click on the black arrow pointing downwards, located on the right of the catalogue list box. The drop down menu displays all the available catalogues on your system (Fig.a). Click on the line labelled @CONSTRAINTS 2020.04.
Fig.a
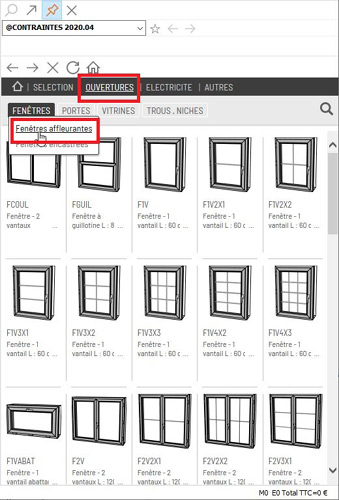
Fig.b
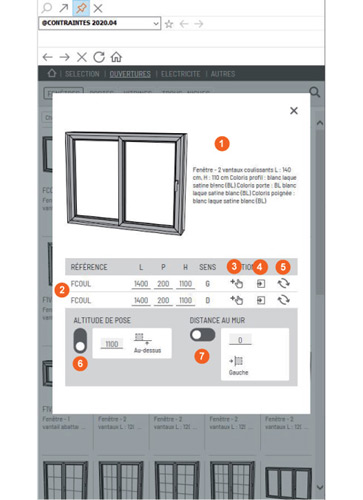
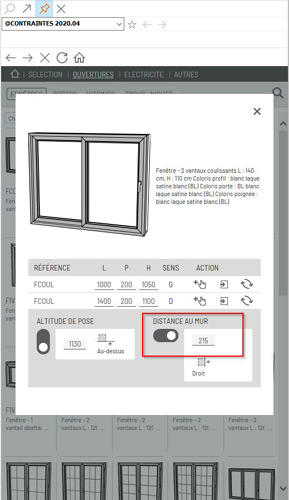
2' - The article reference with the direction of the window opening (L) or (R). 3' - Button for placing the window in the scene. 4' - Button allowing you to link an object to a different element. 5' - Button for replacing one article with another. 6' - Button for the height of the placement in relation to the bottom or top of the wall. 7' - Button for the placement distance from the right or left of the wall. 4. Replace the dimensions that are entered by default in the "W", "D" and "H" text boxes by the width, depth and height in millimetres in the place window. For example, let's enter 1000 for "W" and 1050 for "H". With windows and doors, the depth automatically adapts to the depth of the supporting wall 5. In "PLACEMENT HEIGHT", replace the value of 1100, which refers to the default height of placement (the height of the wall beneath the window) with 1130. The value must be entered into one of the chosen article's placement height list boxes. 6. For a precise placement of the window, specify in the "DISTANCE TO WALL" field the distance separating the window from the end of the wall to the left or to the right. To do so, move the slider to the left or the right. To see which side is the left and which is the right, place yourself in the room that you're designing. To complete our design, enter 215 as a value in the text box with the slider on the right. (Fig.d)
Fig.d
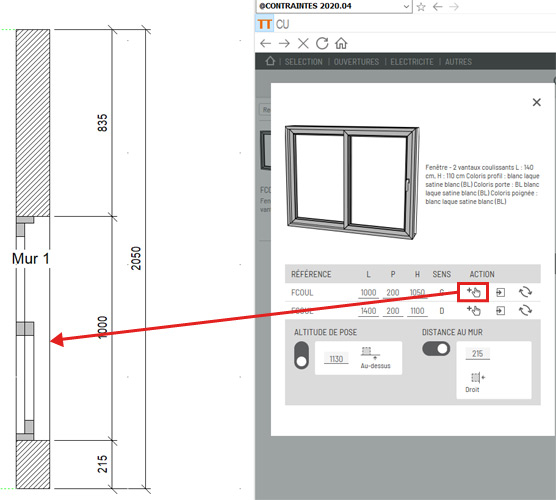
7. Left click on the graphic previsualisation zone of the chosen article and keep the left mouse button pressed down. The mouse cursor will then transform into a small, open hand. 8. Slide the mouse cursor towards the work area to the place where the article should be. Note that the silhouette of the article slides along with the mouse cursor. A right click (with the left mouse button still pressed down) will swivel the article silhouette 45 degrees to the right. 9. Release the left mouse button when the article is positioned above the 2050 mm wall (Fig.e). The window will be automatically placed in the desired spot (i.e. 215 mm from the right-hand wall). You can also directly place the window by clicking on the button in the shape of a hand.
Fig.e
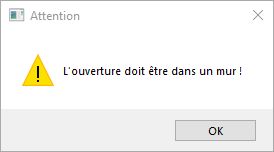
10. If the following message appears, "The opening must be in a wall", then click on " OK" and start again from the sixth step. Make sure that the dimensions are compatible with the wall's dimensions and that they don't overflow its limits. (Fig.f)
Fig.f
|
|
