Placing technical symbols
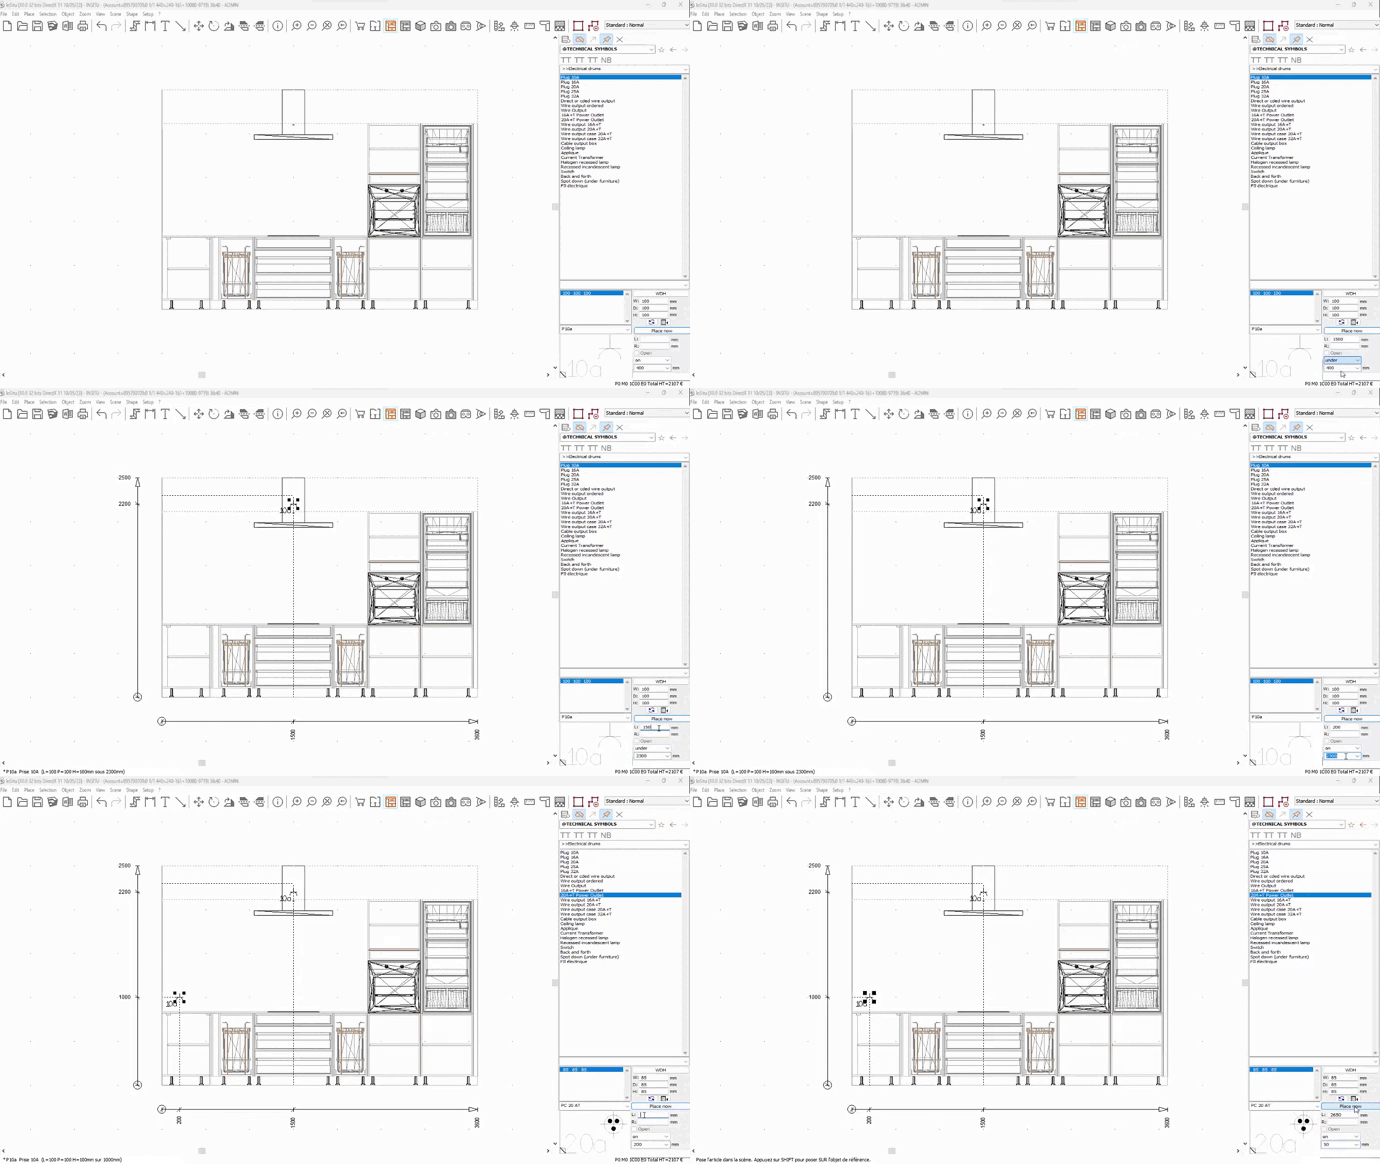
Understanding the Place windowTo provide someone with a full placement folder, whether it's for the placer, the client, ... the water arrivals, the power outlets, the output wires and the other technical constraints must be in the correct places on the designs and the elevations. These particular objects are can all be found in the @TECHNICAL SYMBOLS catalogue. Place yourself in the wireframe elevation perspective to place a power outlet that will be displayed via its technical symbol. To do this: 1. Choose the catalogue named @TECHNICAL SYMBOLS. 2. Choose the block named Outlet 10A in the list of blocks area 3. Enter the distance in the "L" text box to specify the distance between the centre of the outlet and the left end of the wall. If you know the distance between the technical symbol and the right end of the wall, you should fill in this information in the "R" text box.
5. Confirm by clicking on the "Place" button or by pressing on ENTER. If you are not trying to place it very precisely, then you can use the "drag and drop" technique to place your technical symbol.
If you want them to stand out more, then you can change the color of the technical symbol reminder lines To do so, select a technical symbol and right click on it, the click on attributes and modify the colour. To change all the technical symbol reminder lines, don't forget to select "Paste style" on "All". This window also allows you to modify the placement height. Once again, don't forget to select "Paste height" on "All" if you want it to be applied to all the symbols.
|
|


