|
Placing and positioning constraints with the old catalogue (without an Internet connection) '
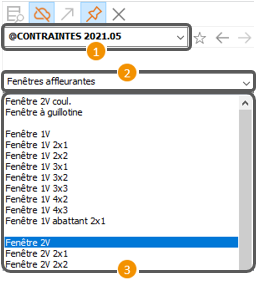
Choose the catalogue named @CONSTRAINTS, which contains the window we want to place.
To do so, click on the drop down menu( ), located to the right of the catalogue list box.
A list will drop down, displaying the list of catalogues available in your software. Click on the line labelled @CONSTRAINTS ), located to the right of the catalogue list box.
A list will drop down, displaying the list of catalogues available in your software. Click on the line labelled @CONSTRAINTS
In the chapter list box, choose the chapter named Flush windows ( ), then choose 2P windows (for two panels) in the blocks list box. ( ), then choose 2P windows (for two panels) in the blocks list box. ( ) )
Now, simply click on the line labelled 2P Window.
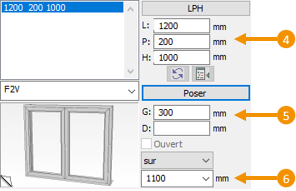
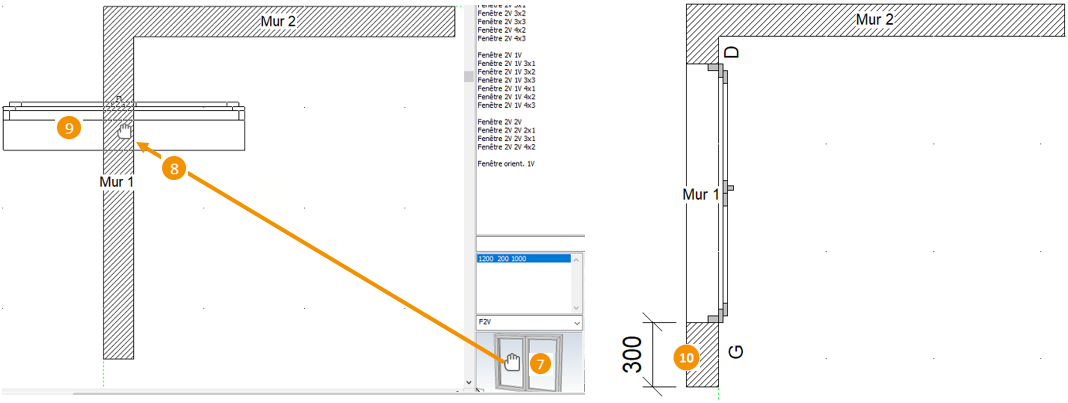
 Allows you to replace the dimensions that are entered by default in the "W", "D" and "H" text boxes by the width, depth and height in millimetres in the place window. With windows and doors, the depth automatically adapts to the depth of the supporting wall Allows you to replace the dimensions that are entered by default in the "W", "D" and "H" text boxes by the width, depth and height in millimetres in the place window. With windows and doors, the depth automatically adapts to the depth of the supporting wall
 Allows you to indicate the position of the window in relation to the distance separating the window from the Right or Left end of the wall.
To see which side is the left and which is the right, place yourself in the room that you're designing. Allows you to indicate the position of the window in relation to the distance separating the window from the Right or Left end of the wall.
To see which side is the left and which is the right, place yourself in the room that you're designing.
 Allows you to Replace the default value in the text box that represents the height of the placement (height of the wall beneath the window). Pick whether the element will be placed on top or under Allows you to Replace the default value in the text box that represents the height of the placement (height of the wall beneath the window). Pick whether the element will be placed on top or under
 Click on the previsualisation graphic zone of the chosen article with a left mouse click and keep it pressed down. The mouse cursor will then change into a silhouette of a hand. Click on the previsualisation graphic zone of the chosen article with a left mouse click and keep it pressed down. The mouse cursor will then change into a silhouette of a hand.
 Slide the mouse cursor towards the work area to the place where the article should be. Note that the silhouette of the article slides along with the mouse cursor. A right click (with the left mouse button still pressed down) will swivel the article silhouette 45 degrees to the right. Slide the mouse cursor towards the work area to the place where the article should be. Note that the silhouette of the article slides along with the mouse cursor. A right click (with the left mouse button still pressed down) will swivel the article silhouette 45 degrees to the right.
 Once the article is positioned above the wall, release the left mouse button. Once the article is positioned above the wall, release the left mouse button.
 The window is then automatically placed in the desired spot. The window is then automatically placed in the desired spot.
i TIP
You can also place a constraint in relation to another. In this case, all you need to do is specifying the distance you want between the two constraints in the G or D box and sliding the constraint you wish to place in the already placed constraint. The system will understand that the the constraint rather than the wall is now the reference point for positioning the element.
ENTIRELY CUSTOMISABLE DOOR AND WINDOW MODELS
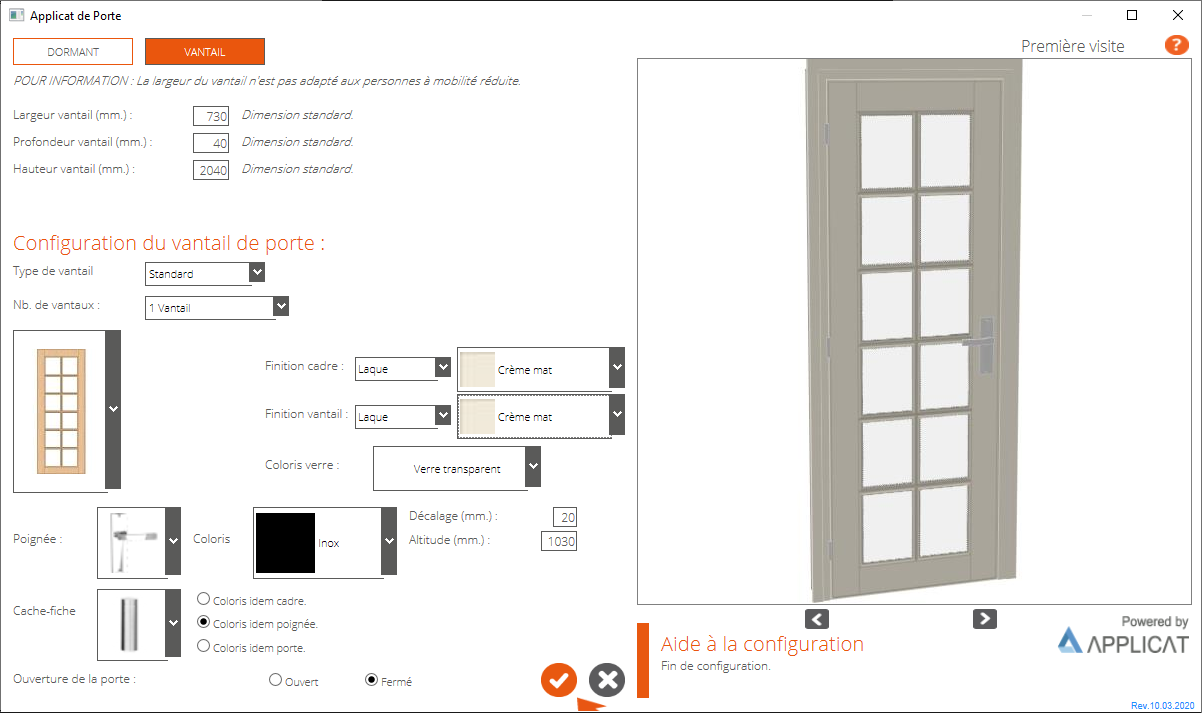
The @CONSTRAINTS catalogue contains the articles Door (Custom. Applicat) and Window (Custom. Applicat). This allows you to customise the windows and doors to your taste and depending on your needs.
To find out how to create and personalise your doors and windows, check out the Decorating Course of the wiki.
SKYLIGHTS
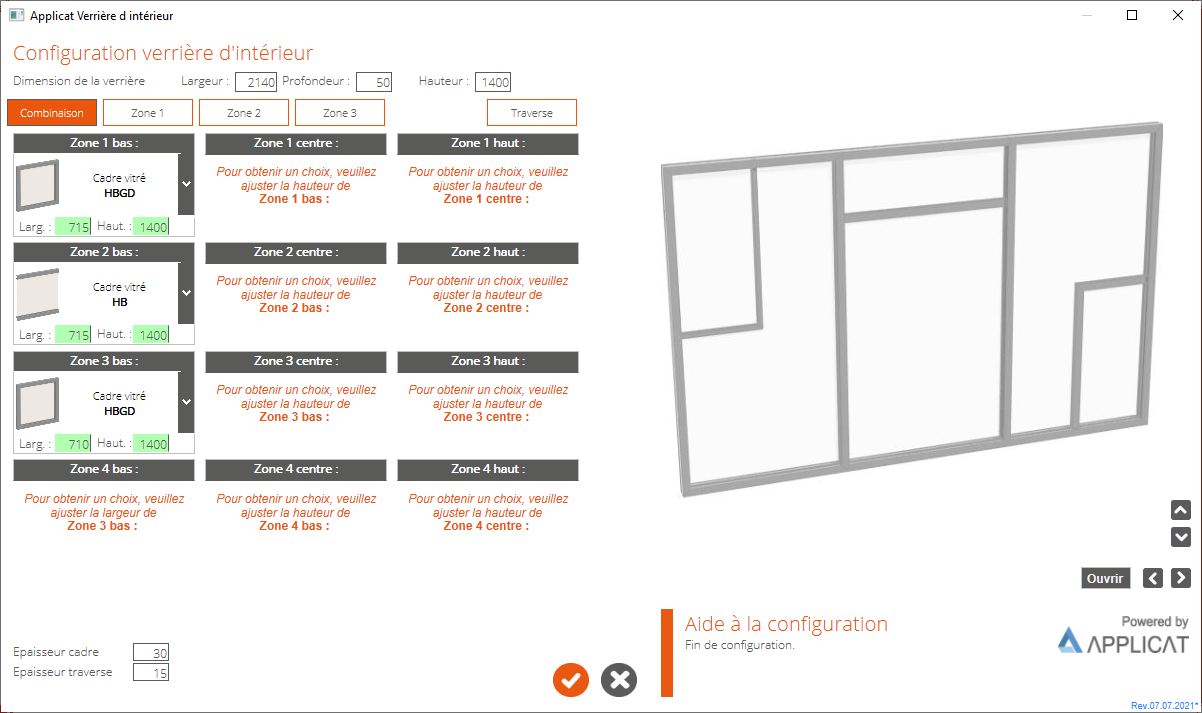
The @SKYLIGHTS catalogue comes with a customisation assistant (AppliCat) to quickly and simply creates skylights with doors, bases, crossbars, imposts...
To find out how to create and personalise your skylight, check out the Decorating Course of the wiki.
|
